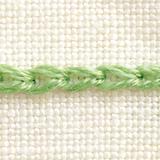


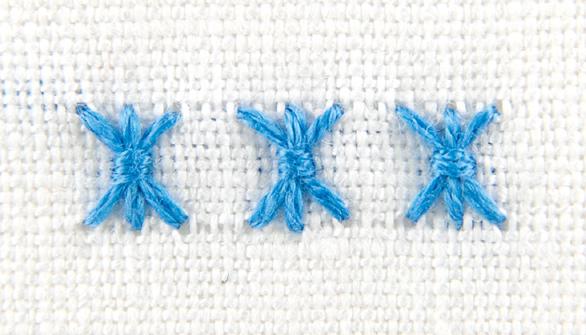
シーフステッチの針目
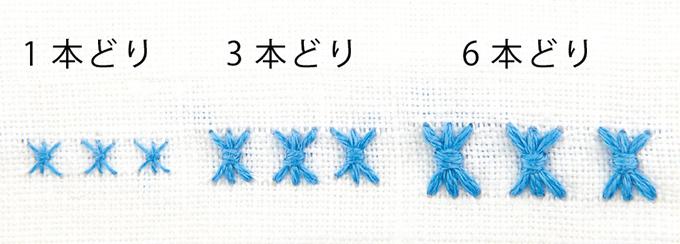
糸の太さ
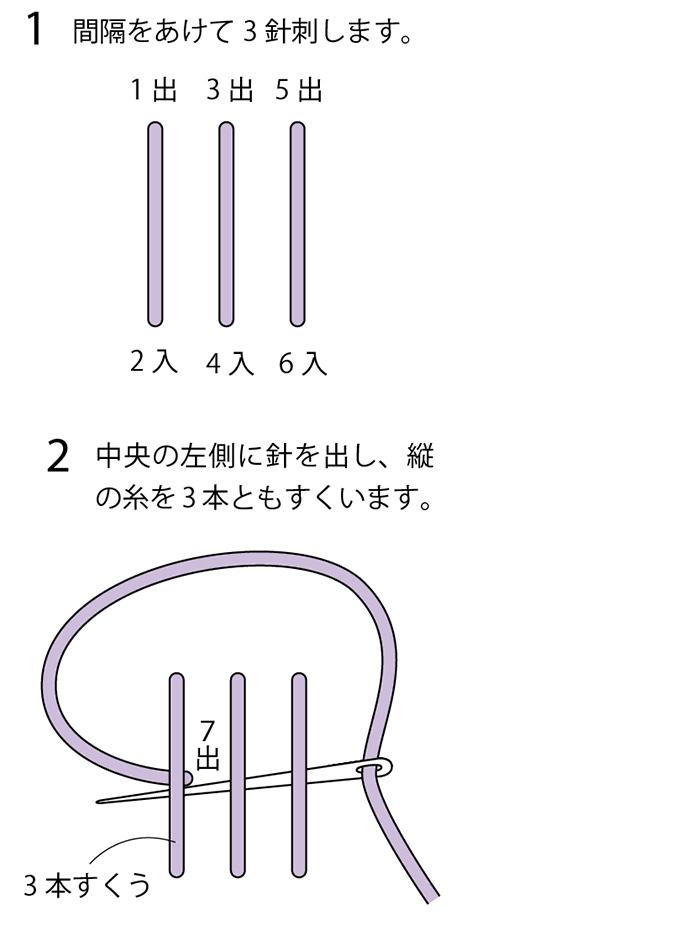
シーフステッチの刺し方
1. 間隔をあけて3針刺します。
2. 中央の左側に針を出し、縦の糸を3本ともすくいます。
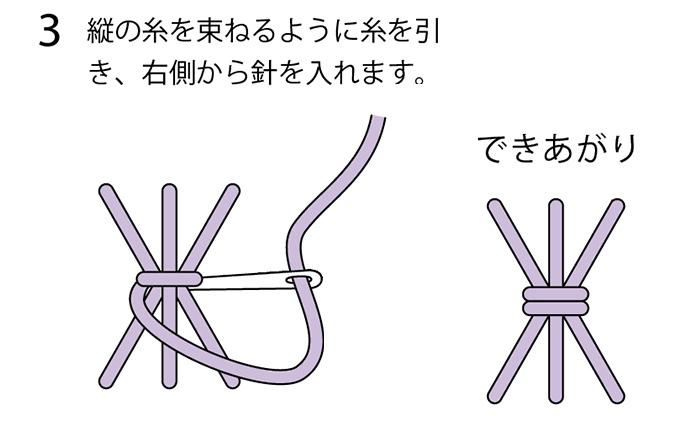
3. 縦の糸を束ねるように糸を引き、右側から針を入れます。
できあがり
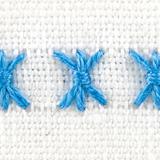
「シーフステッチ」の刺し方をご紹介。背景を刺して埋めるのに使われるステッチですが、並べて幾何学模様のように使うとおしゃれです。
1. 間隔をあけて3針刺します。
2. 中央の左側に針を出し、縦の糸を3本ともすくいます。
3. 縦の糸を束ねるように糸を引き、右側から針を入れます。
できあがり