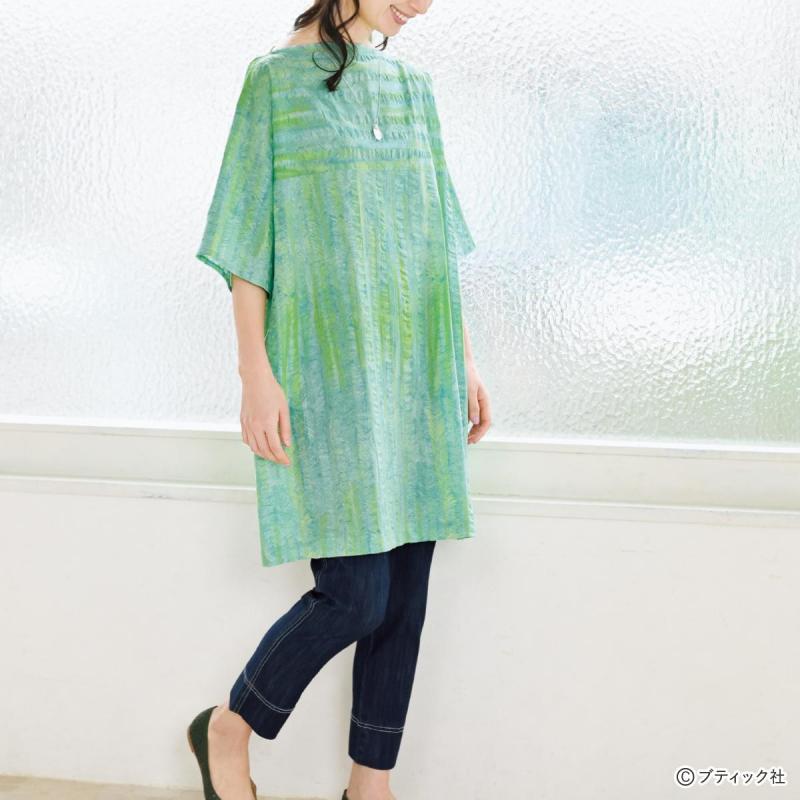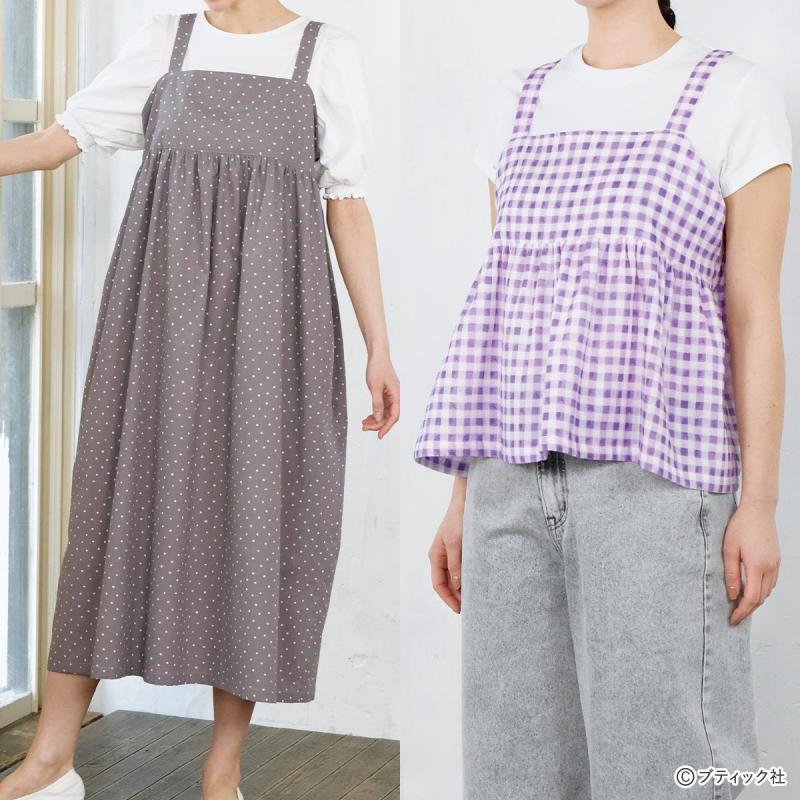


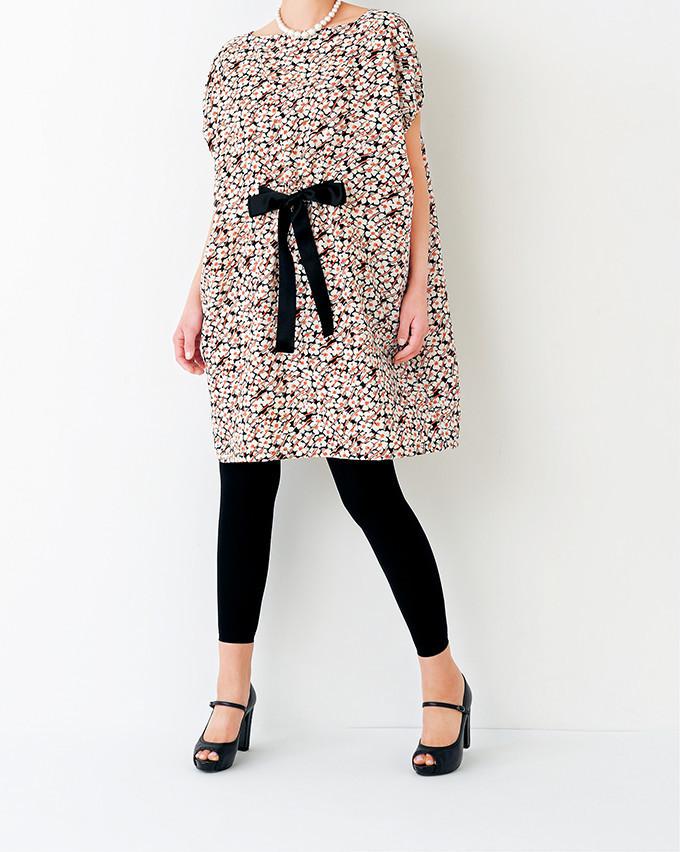
直線縫いで簡単に作れる!リボン使いのおしゃれなワンピースの材料
・表布(ポリエステルプリント)110cm幅1m90cm
・ゴムテープA(袖口用・8mm幅)80cm
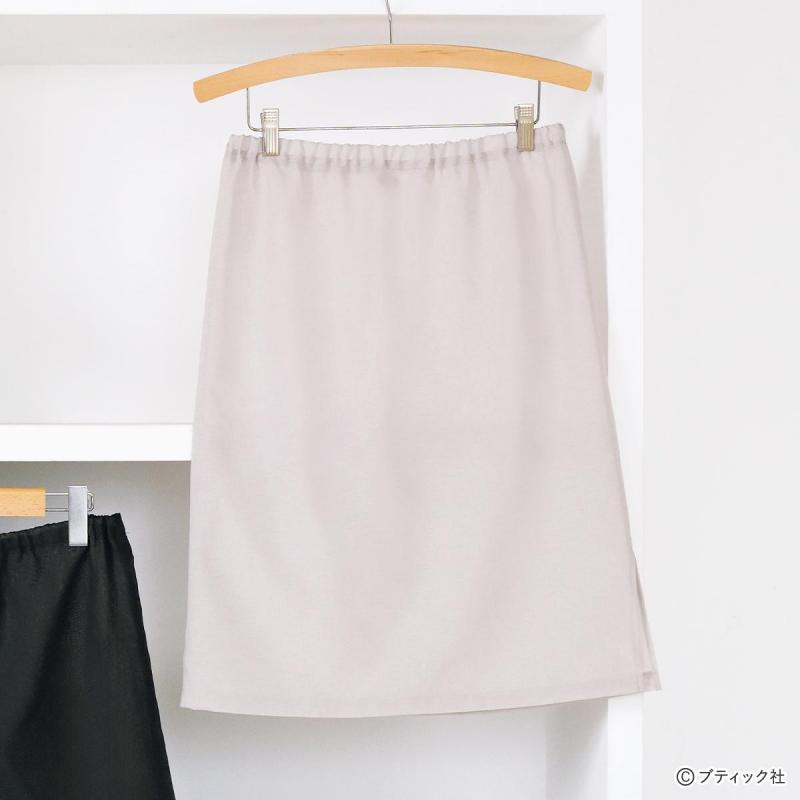
・ゴムテープB(ウエスト用・20mm幅)20cm
・サテンリボン(36mm幅)1m30cm
★できあがり寸法 着丈…90cm
裁ち方図
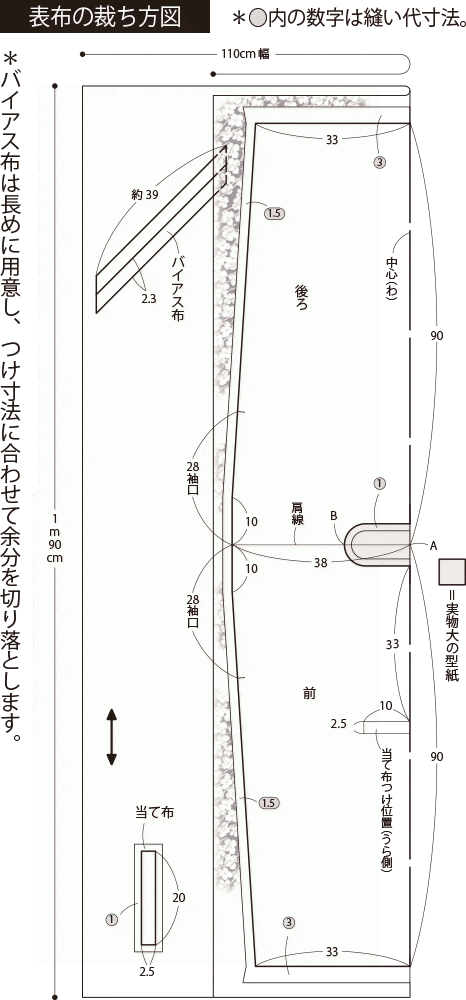
【表布の裁ち方図】*〇内の数字は縫い代寸法。
バイアス布
後ろ
前
当て布
*バイアス布は長めに用意し、つけ寸法に合わせて余分を切り落とします。
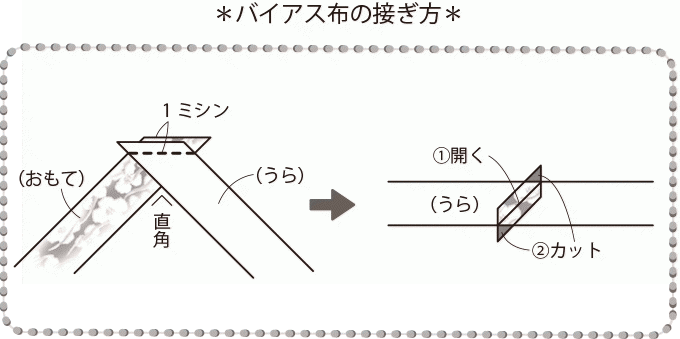
*バイアス布の接ぎ方*
1ミシン
↓
①開く
②カット
作り方
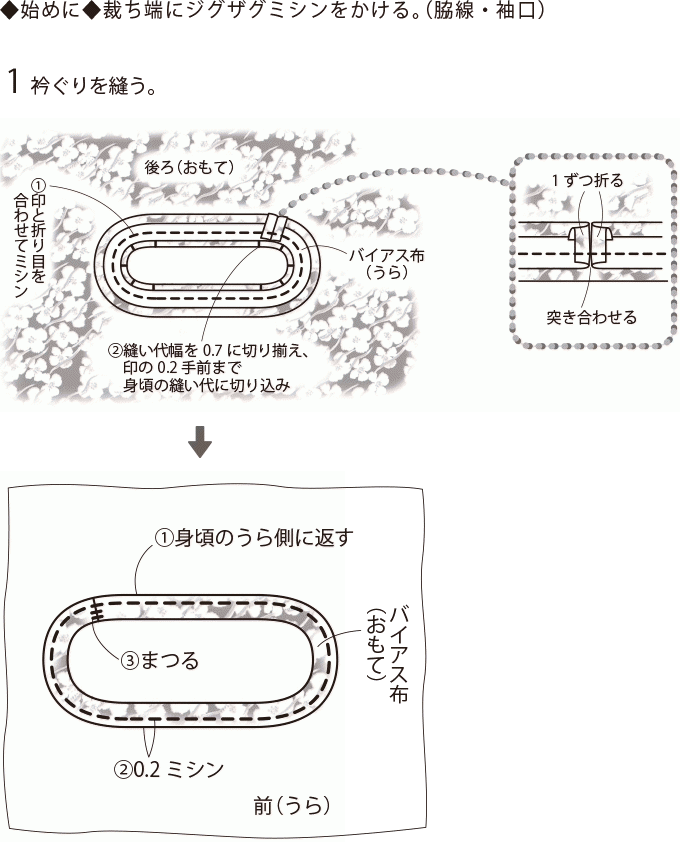
◆始めに◆裁ち端にジグザグミシンをかける。(脇線・袖口)
1 衿ぐりを縫う。
①印と折り目を合わせてミシン
②縫い代幅を0.7に切り揃え、印の0.2手前まで
身頃の縫い代に切り込み
↓
①身頃のうら側に返す
②0.2ミシン
③まつる
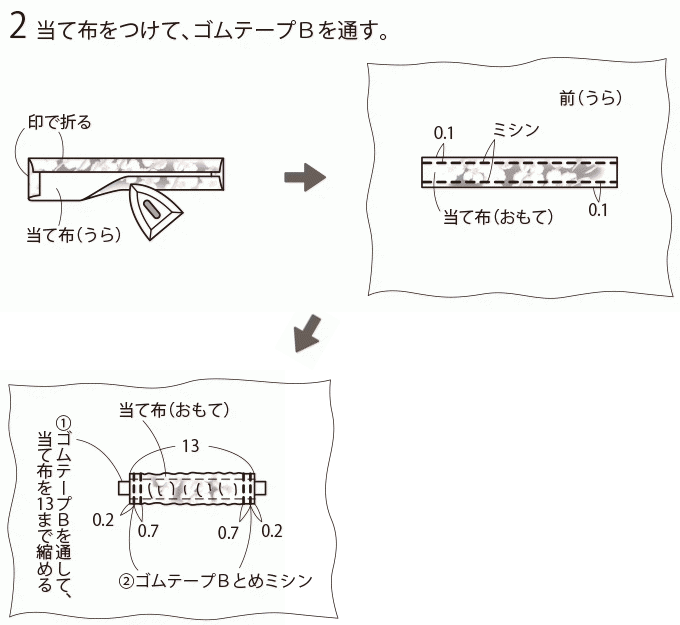
2 当て布をつけて、ゴムテープBを通す。
印で折る
↓
ミシン
↓
①ゴムテープBを通して、当て布を13まで縮める
②ゴムテープBとめミシン
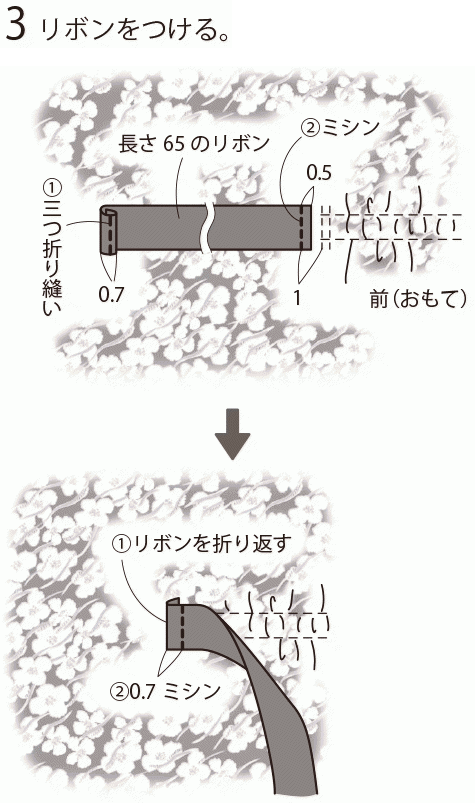
3 リボンをつける。
①三つ折り縫い
②ミシン
↓
①リボンを折り返す
②0.7ミシン
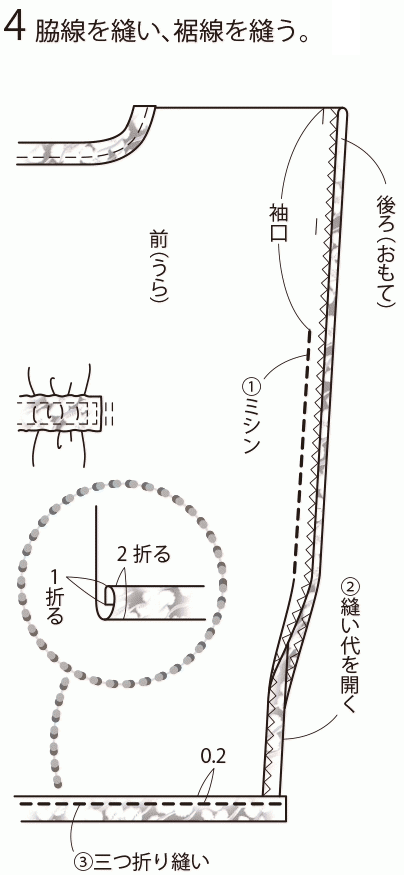
4 脇線を縫い、裾線を縫う。
①ミシン
②縫い代を開く
③三つ折り縫い
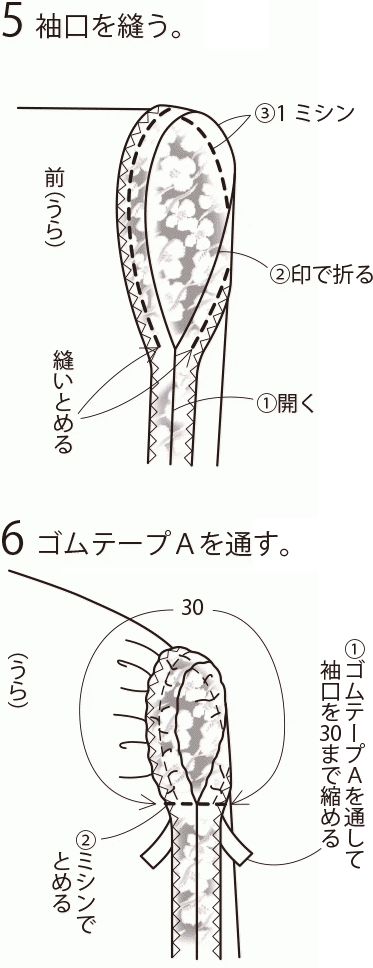
5 袖口を縫う。
①開く
②印で折る
③1ミシン
6 ゴムテープAを通す。
①ゴムテープAを通して袖口を30まで縮める
②ミシンでとめる