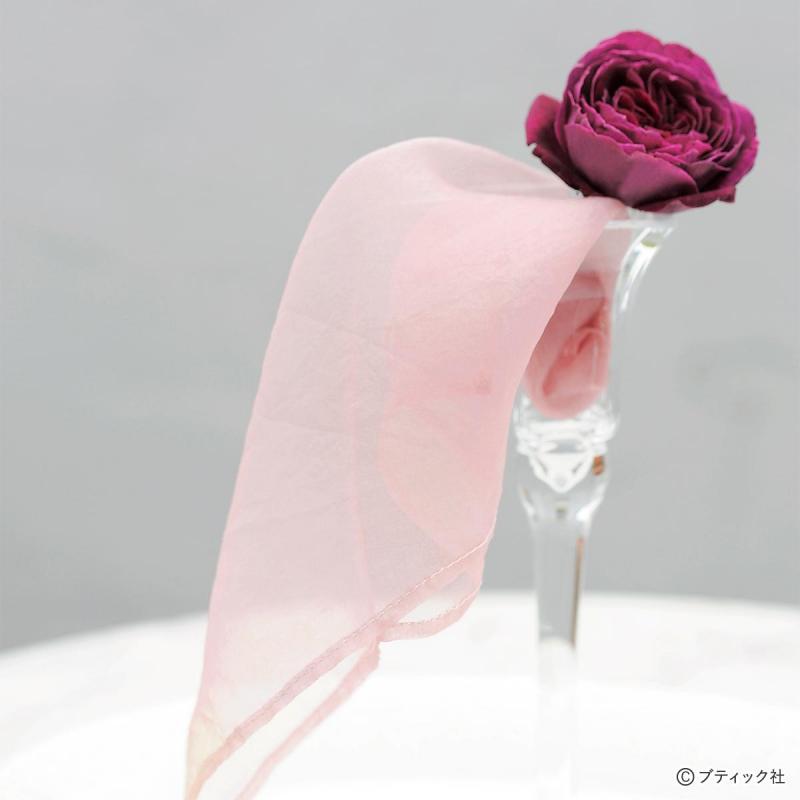


▲後ろ
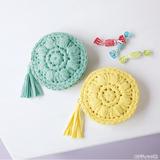
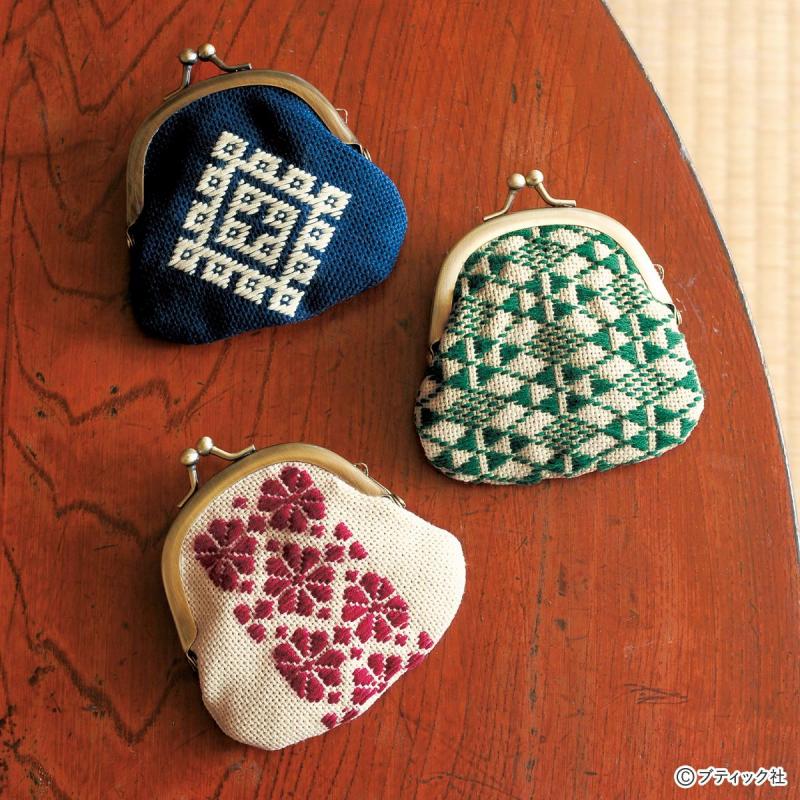
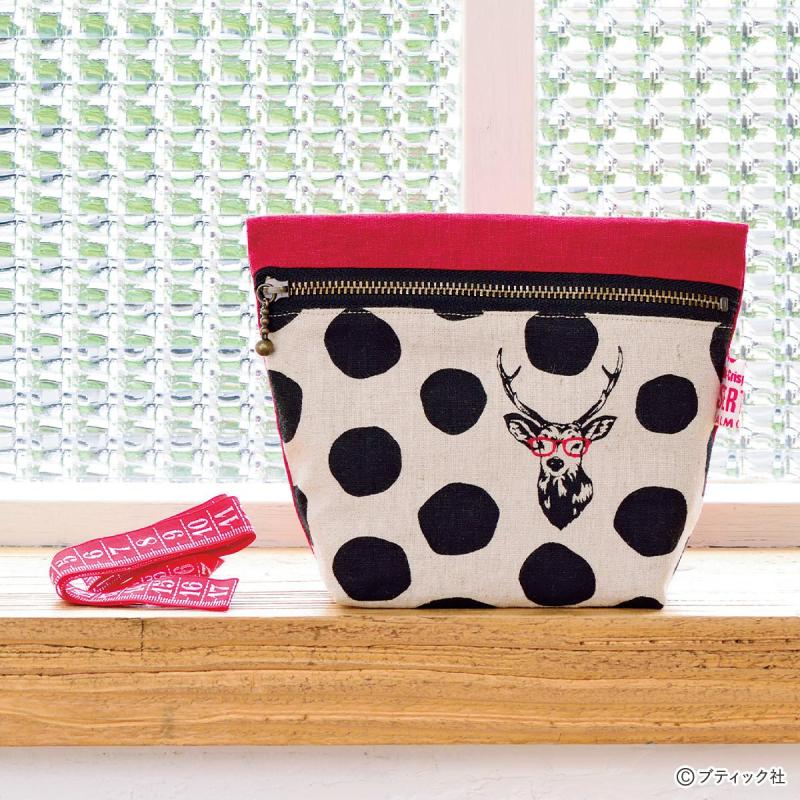
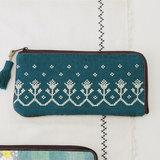
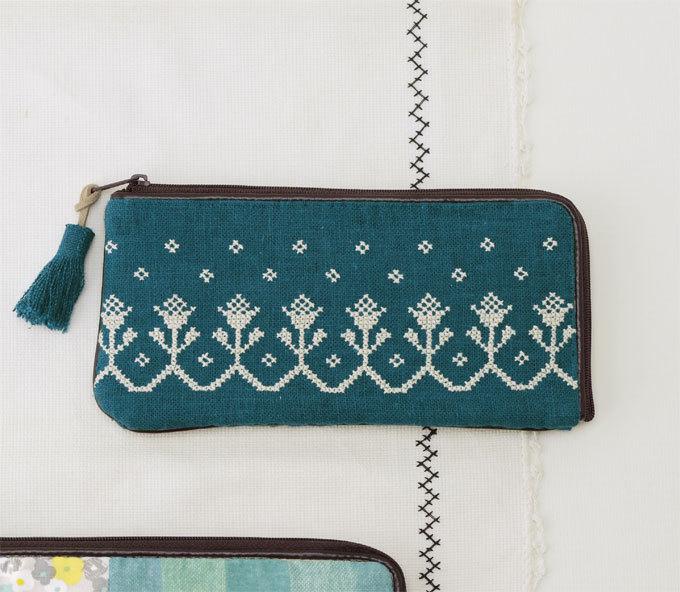
簡単に手作り!おしゃれなクロスステッチのお財布の材料
・表布(リネン)30cm幅 50cm
・0.3cm幅の革ひも 10cm
※【Amazon】で購入するならこちらから!
・25番刺しゅう糸(ECRU)
・水にとけるクロスステッチ用ガイドシール(14カウント)
※【Amazon】で購入するならこちらから!
・市販のウォレット
・手芸用の財布
ウォレット・ベージュ
株式会社KAWAGUCHI(KAWAGUCHI 13-294)
※【Amazon】で購入するならこちらから!

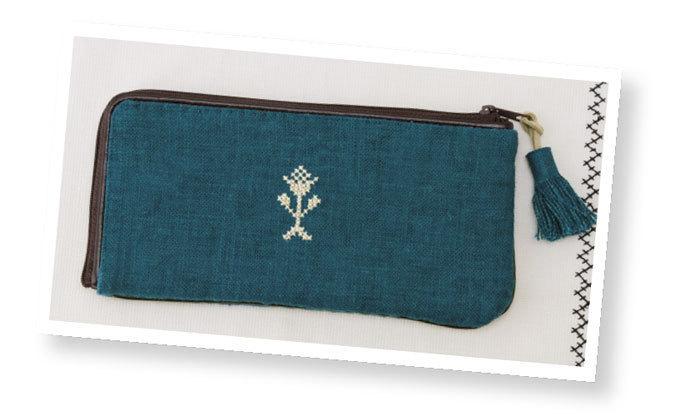
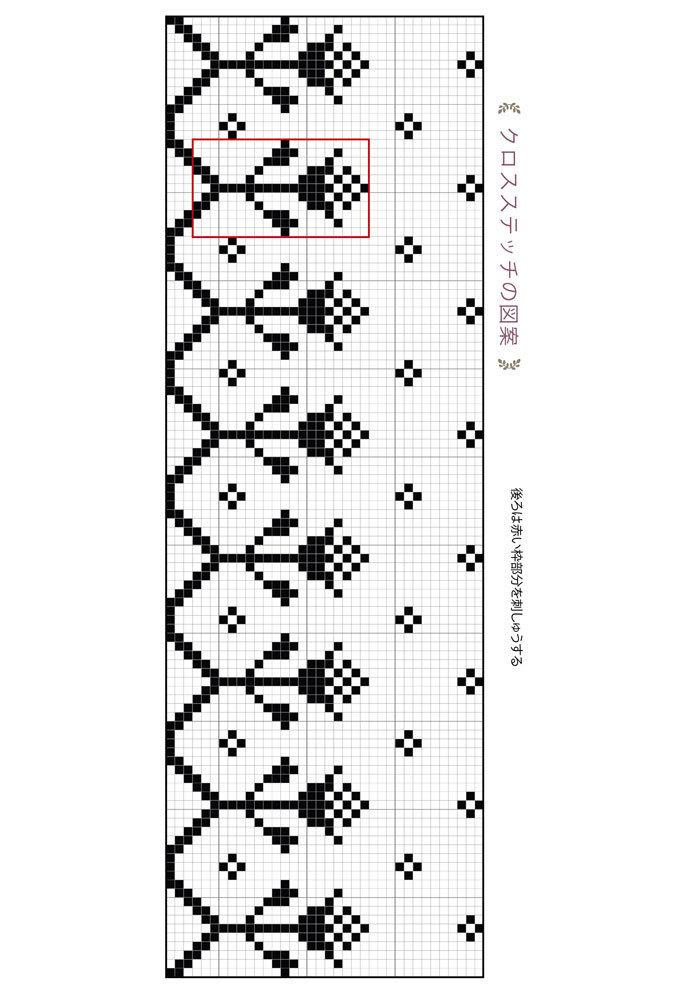
簡単に手作り!おしゃれなクロスステッチのお財布の図案 ※実物大ではありません
≪クロスステッチの図案≫ 後ろは赤い枠部分を刺しゅうする
簡単に手作り!おしゃれなクロスステッチのお財布の作り方
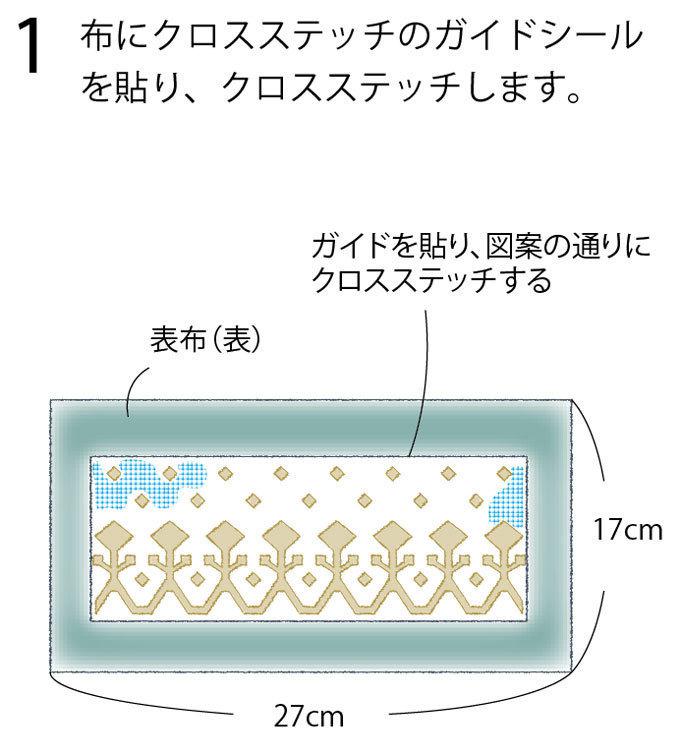
1 布にクロスステッチのガイドシールを貼り、クロスステッチします。
1 布にクロスステッチのガイドシールを貼り、クロスステッチします。
ガイドを貼り、図案の通りにクロスステッチする
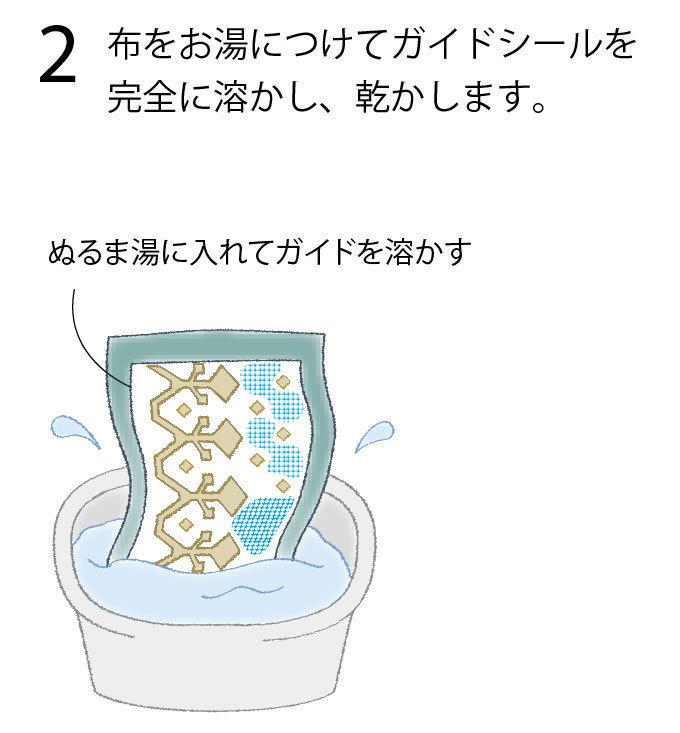
2 布をお湯につけてガイドシールを完全に溶かし、乾かします。
ぬるま湯に入れてガイドを溶かす
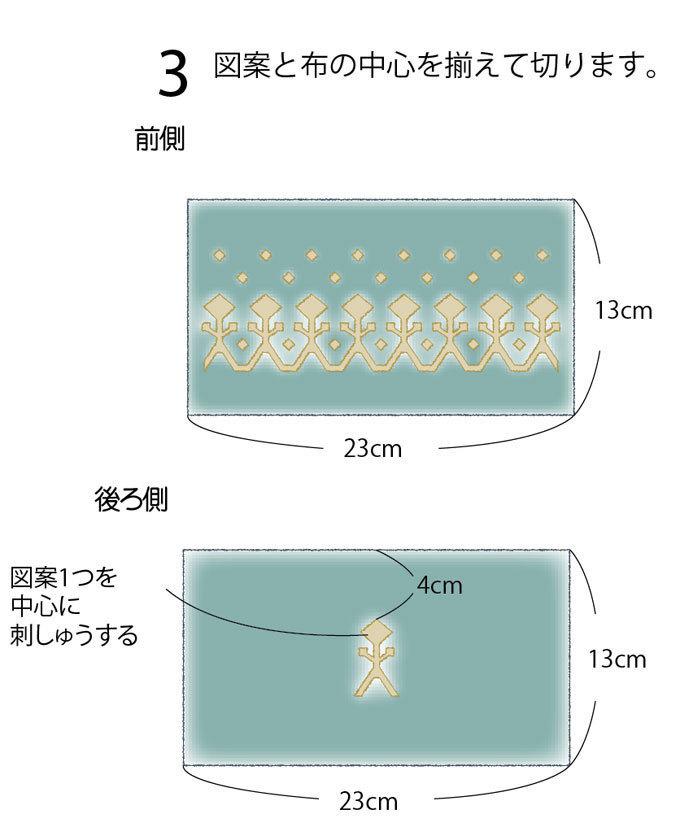
3 図案と布の中心を揃えて切ります。
図案1つを中心に刺しゅうする
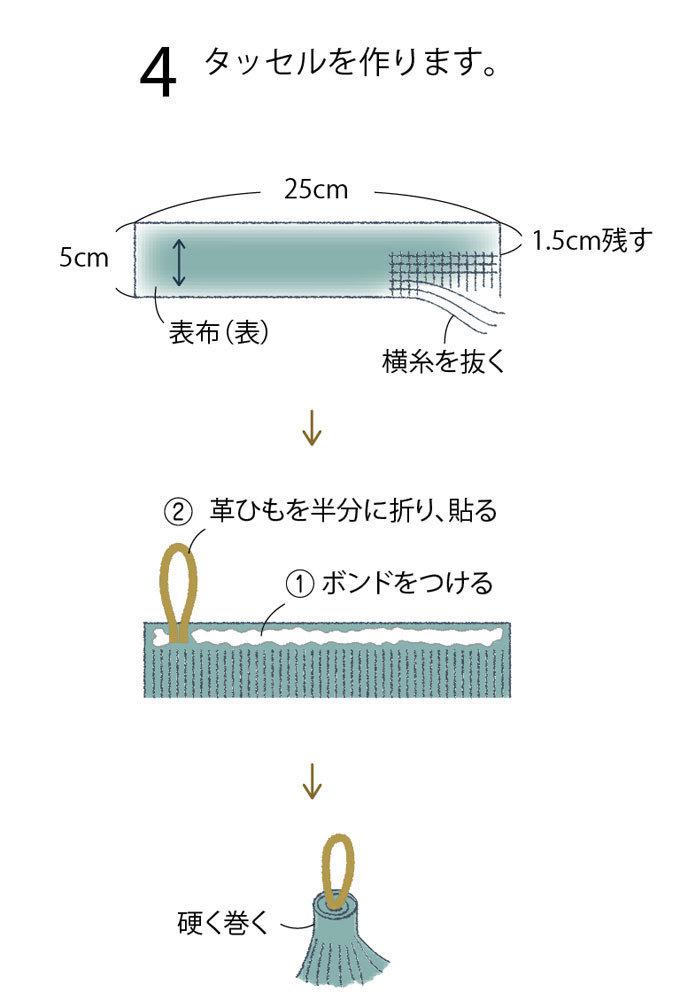
4 タッセルを作ります。
①ボンドをつける
②革ひもを半分に折り、貼る
↓
硬く巻く
5 クロスステッチした布をウォレットにまつりつけます。
ファスナーの金具に通してタッセルを入れる