


はじめに|折り紙手芸の基礎
作品を作る前に、まずは折り紙手芸の基礎を理解してから進めましょう!
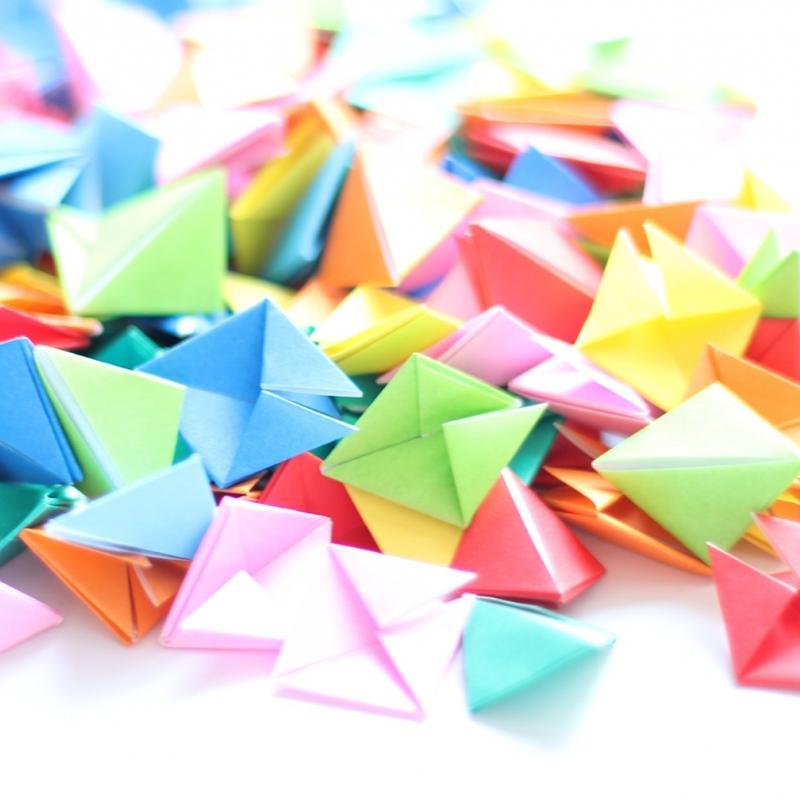
■折り方
3種類あります。お手元の紙が1対2なのか、1対2弱なのか、1対2強なのか、確かめてから折りましょう。
ここでは、1対2弱の場合(市販の紙、コピー用紙、広告チラシなど)のパーツの折り方が必要になります。折り方の詳細は下記で紹介しているので、参照してください。
【三角パーツの折り方(1対2弱の場合)】はこちらから
■道具とのり付け方法
組んだパーツはボンドを使って固定します。詳しいやり方は下記で紹介しているので、参照してください。
【折り紙手芸の道具とのり付け方法】はこちらから
■パーツのしくみ
別記事で紹介していますので、こちらより該当箇所をご参照ください。
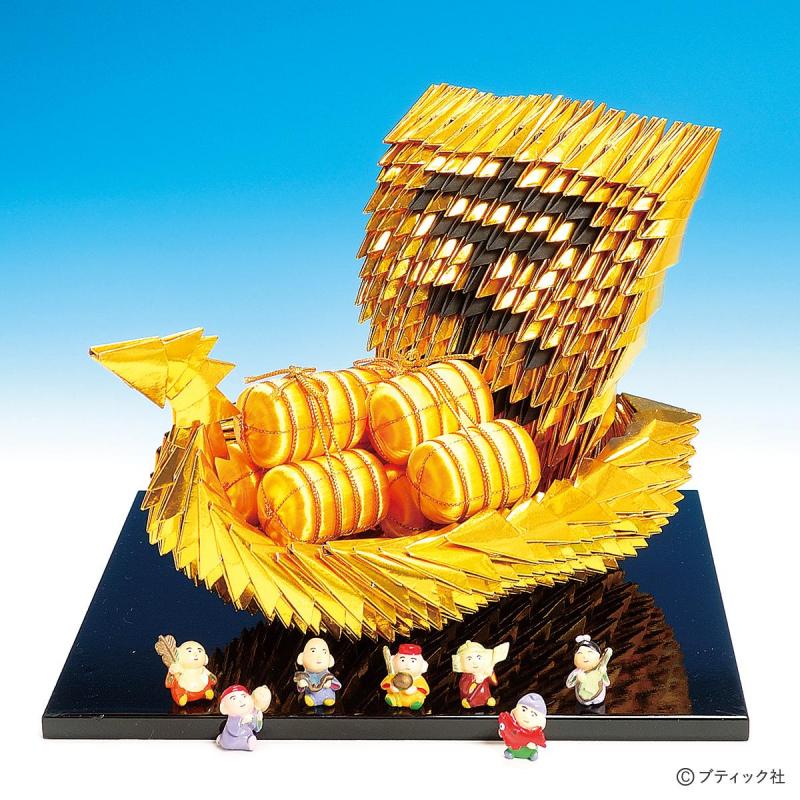
必要な材料
★できあがり寸法:
船の全長=約21cm 幅=約15cm 首船の高さ=約13.5cm
帆の幅=約15cm 高さ=約18cm
●折り紙
・紙
5cm×9cm 金折り紙 605枚(1枚は折らない=船の後側)
5cm×9cm 色は自由、折り紙 604枚
(折り紙の金の場合は薄手の紙と2枚重ねにしてパーツを折る)
5cm×9cm 黒上質紙 35枚
・竹串 18cm 1本
・ボール紙 5cm×9cm
組立図
【船首】
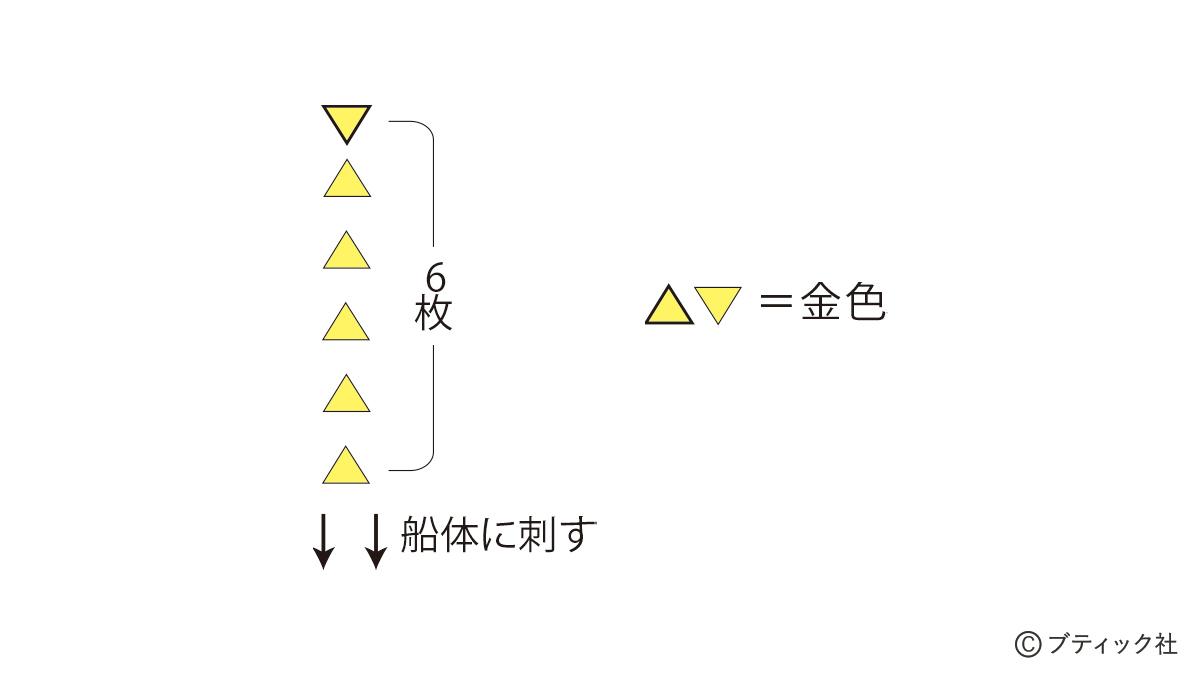
【船体】
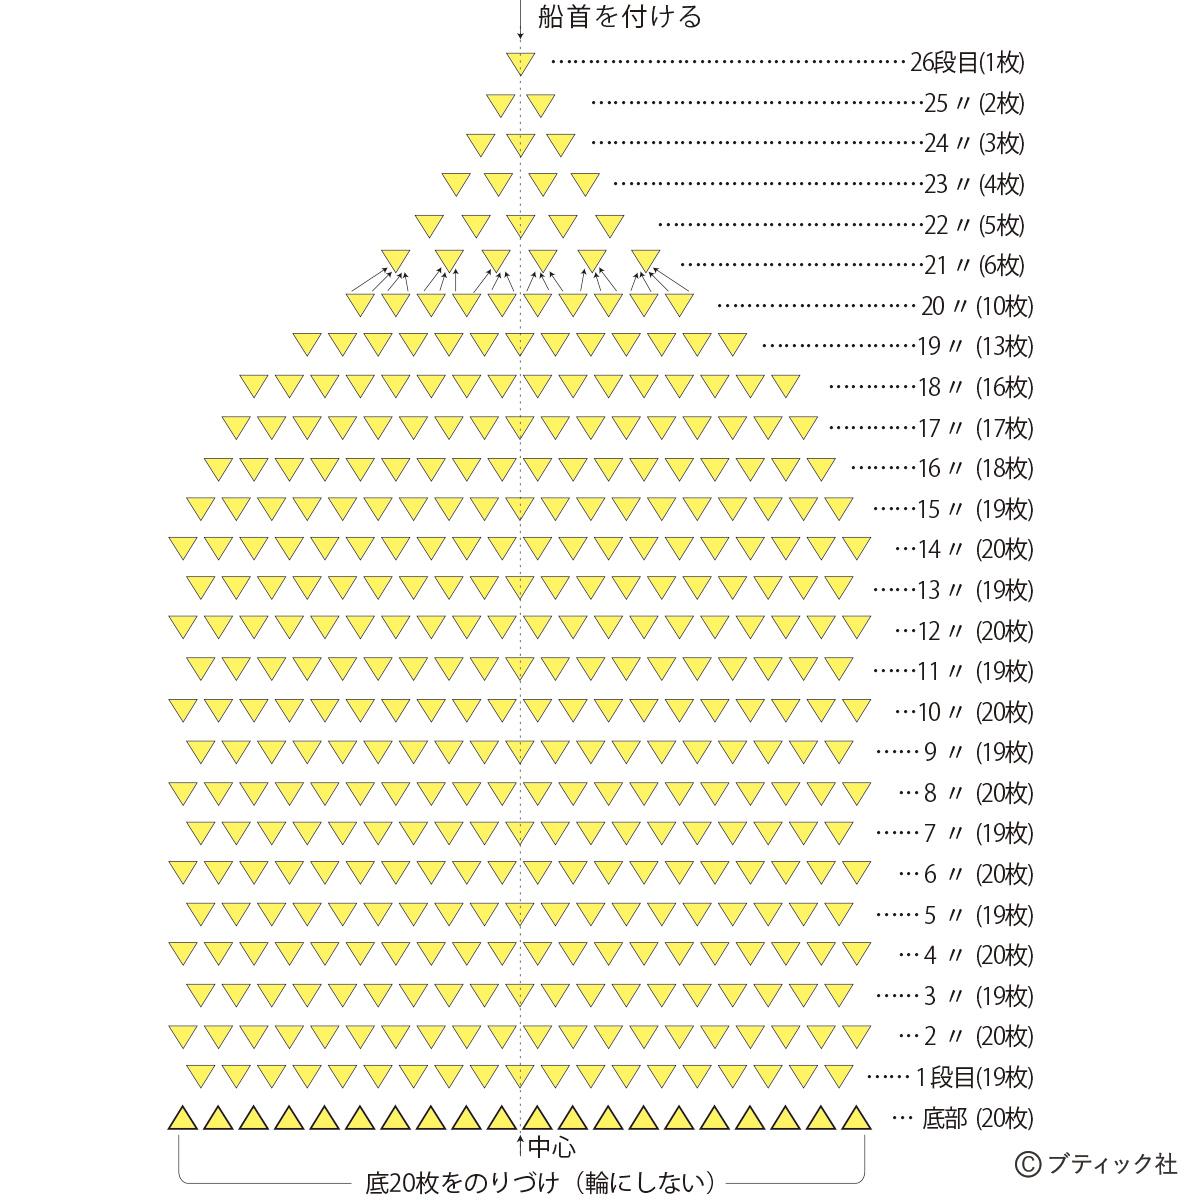
【帆】
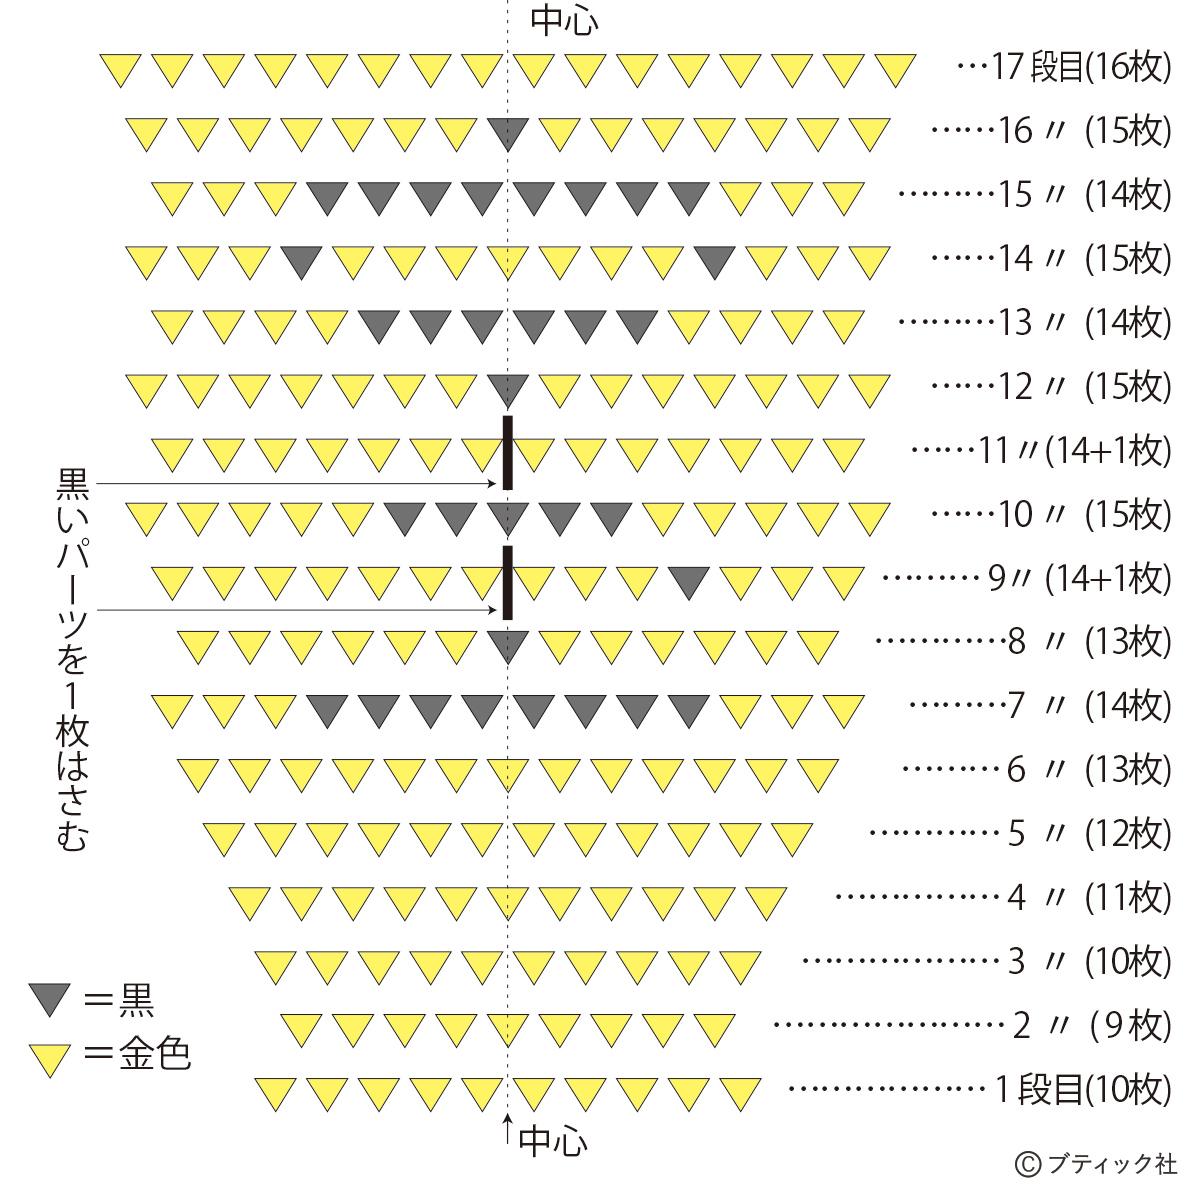
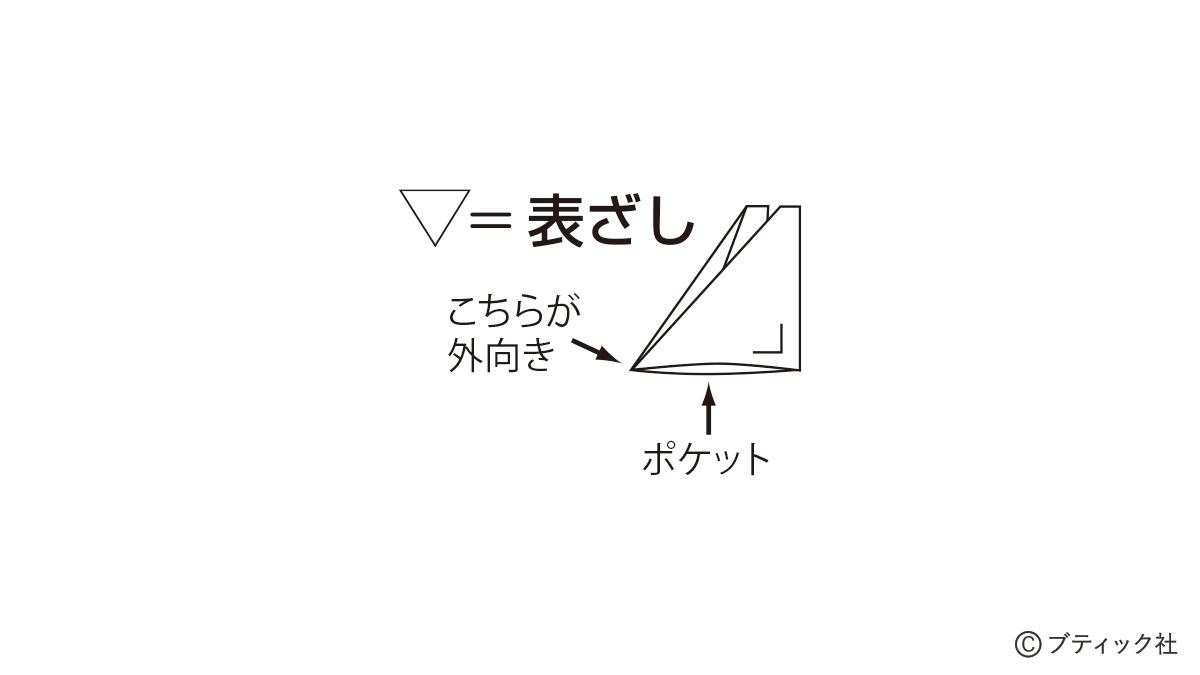
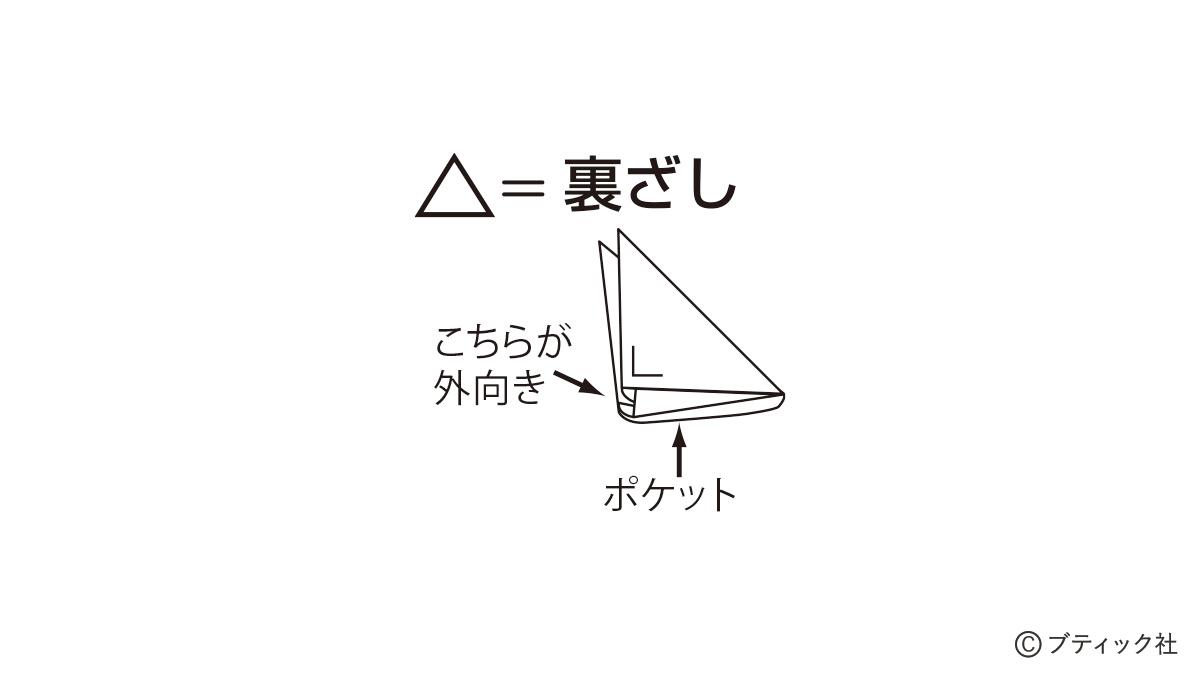
*記号の見方
作り方
*帆を作る
01 2枚のパーツを持ち、「三角部分」にボンドをつけます。