


02
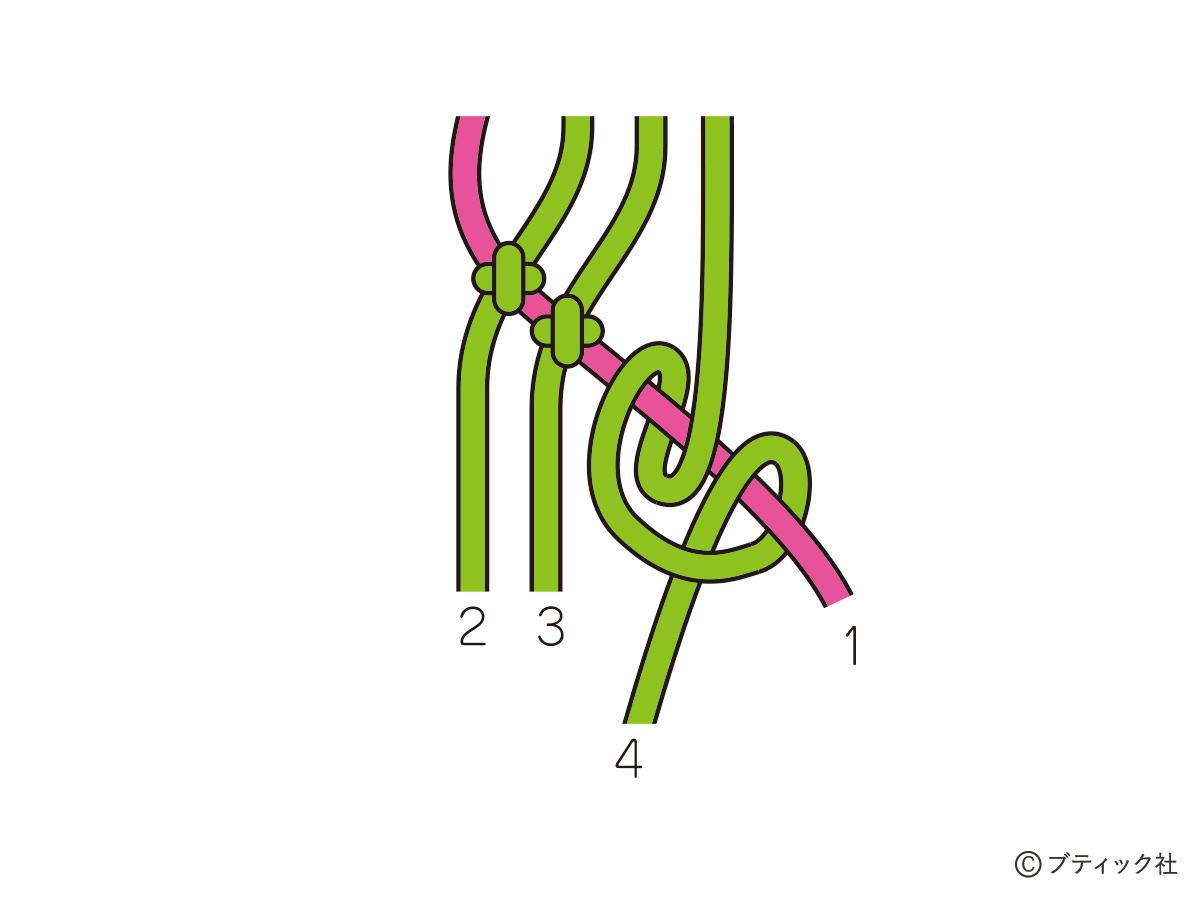
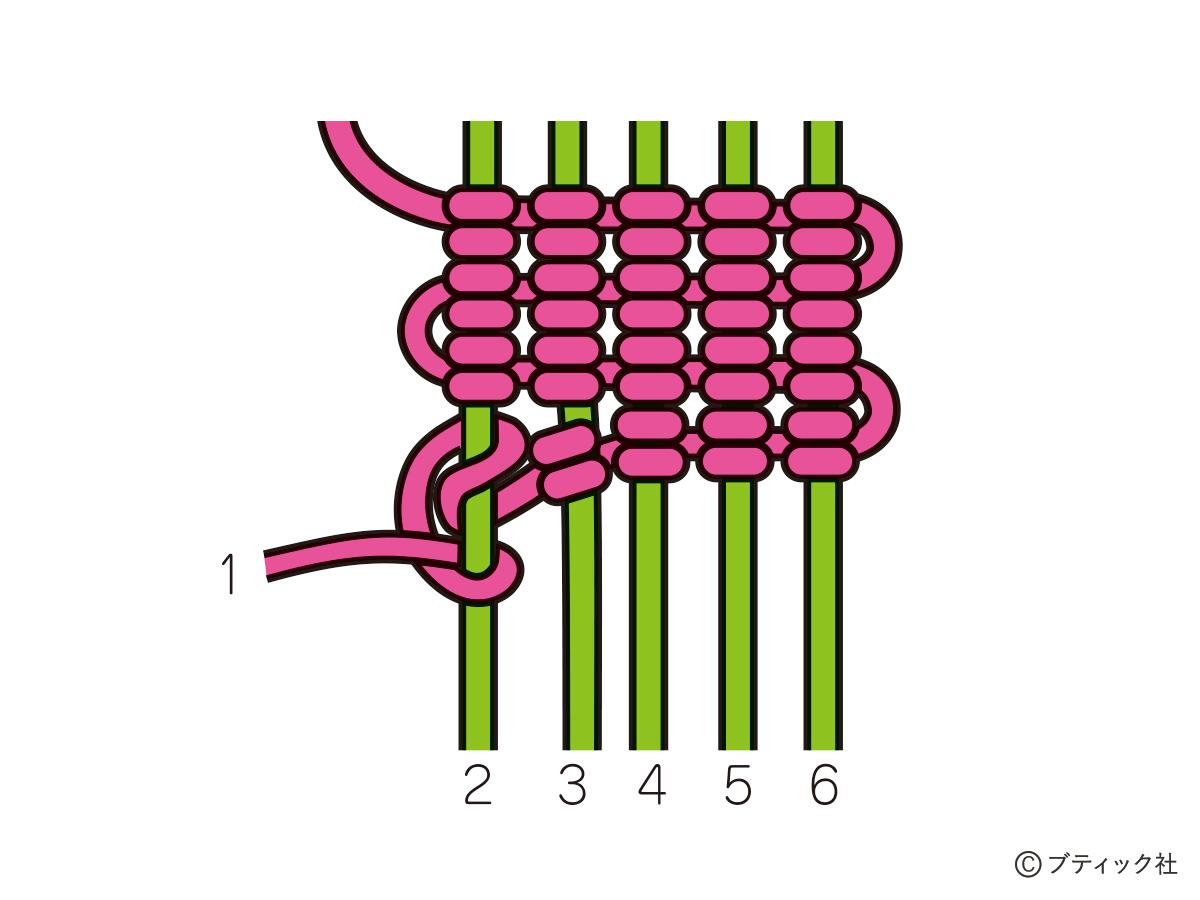
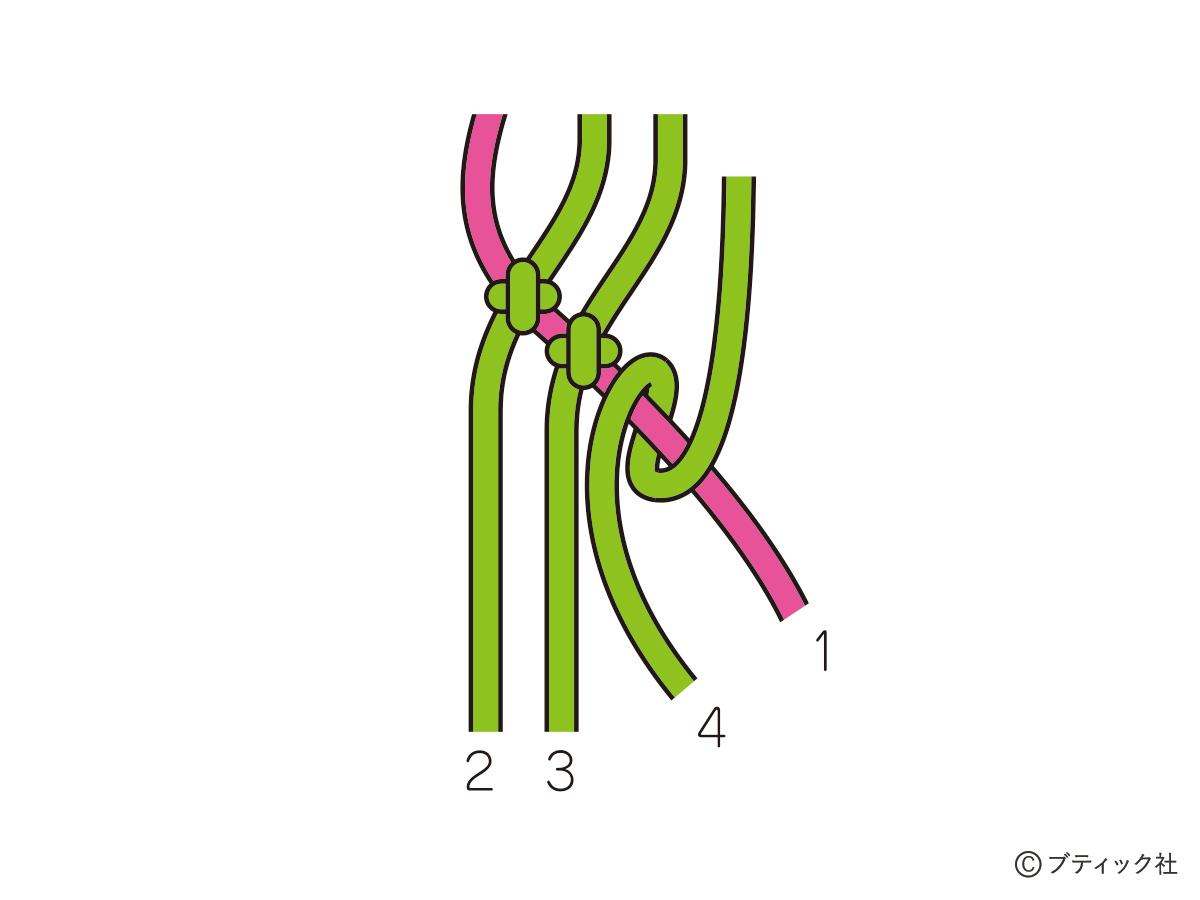
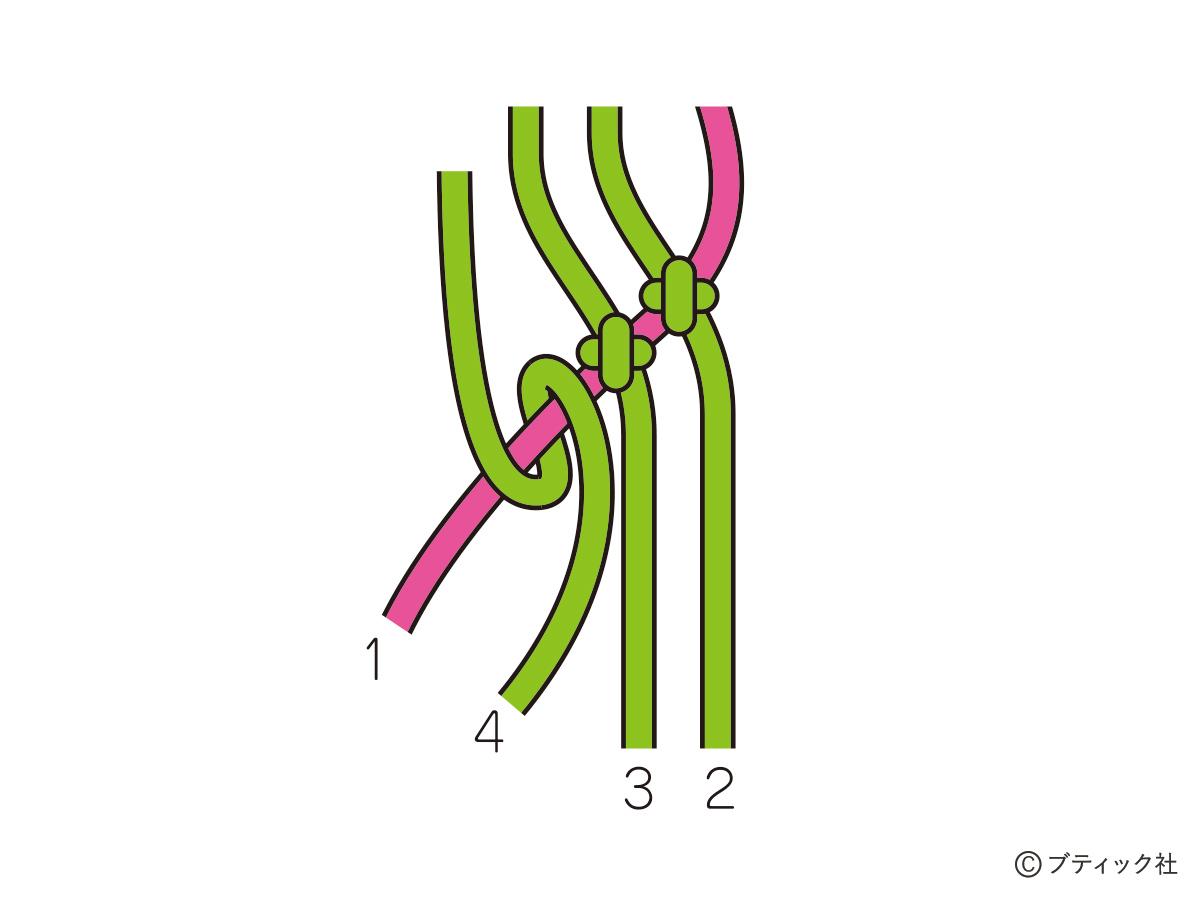
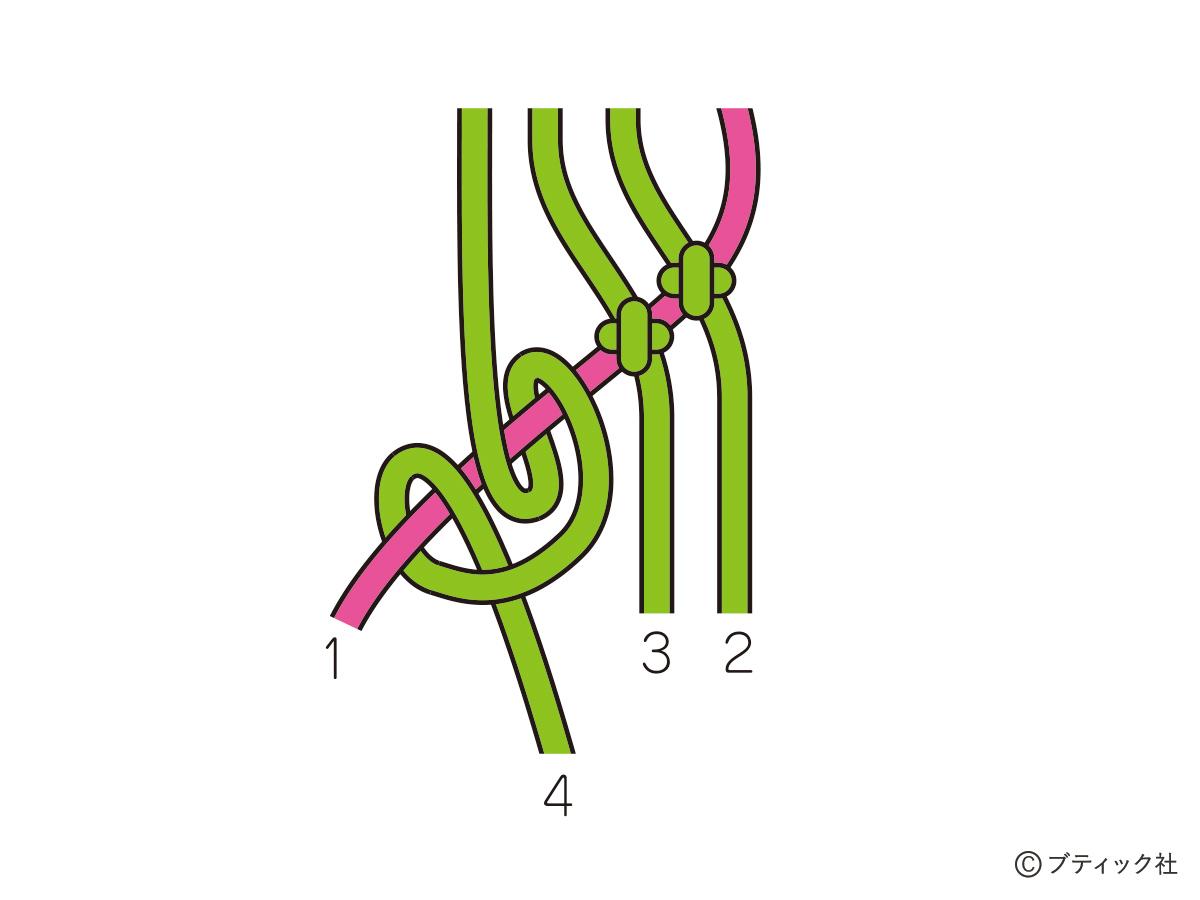
*【斜めよこ裏巻き結び】 (右上から左下へ)のやり方
よこ裏巻き結びを応用した結び方です。右上から左下へ斜めに進んでいきます。1の糸に2、3、4の糸を図のようにかけ、1の糸をピンと張り、結びます。
01
02
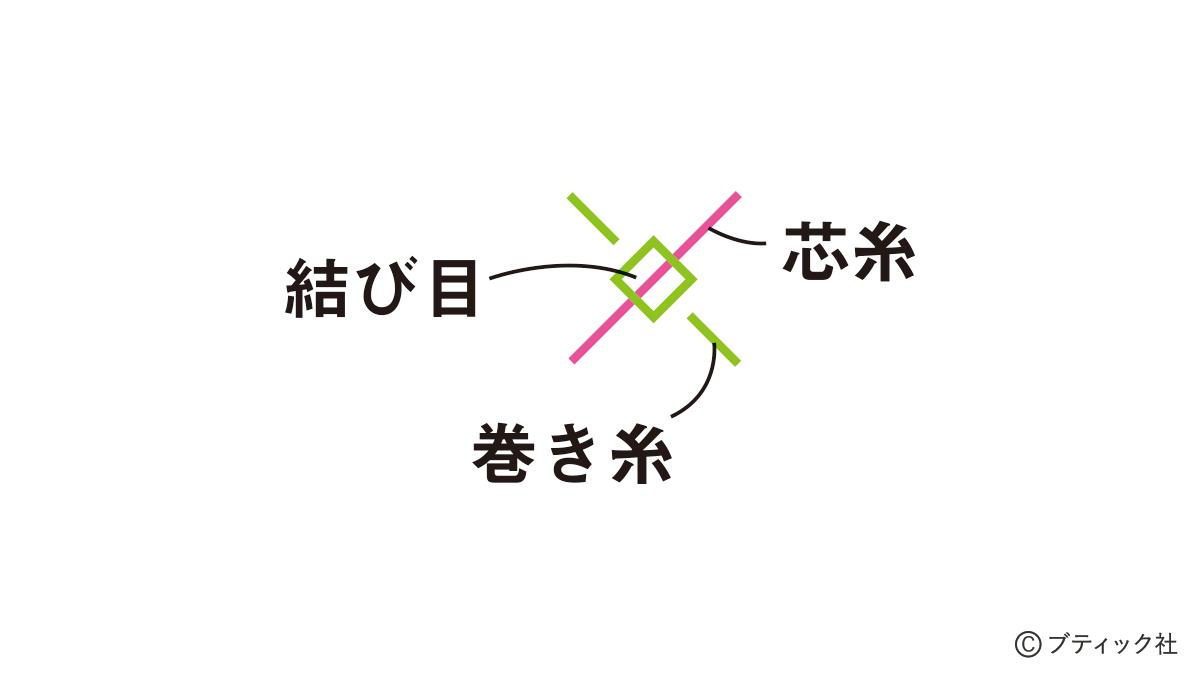
*【たて巻き結び】のやり方
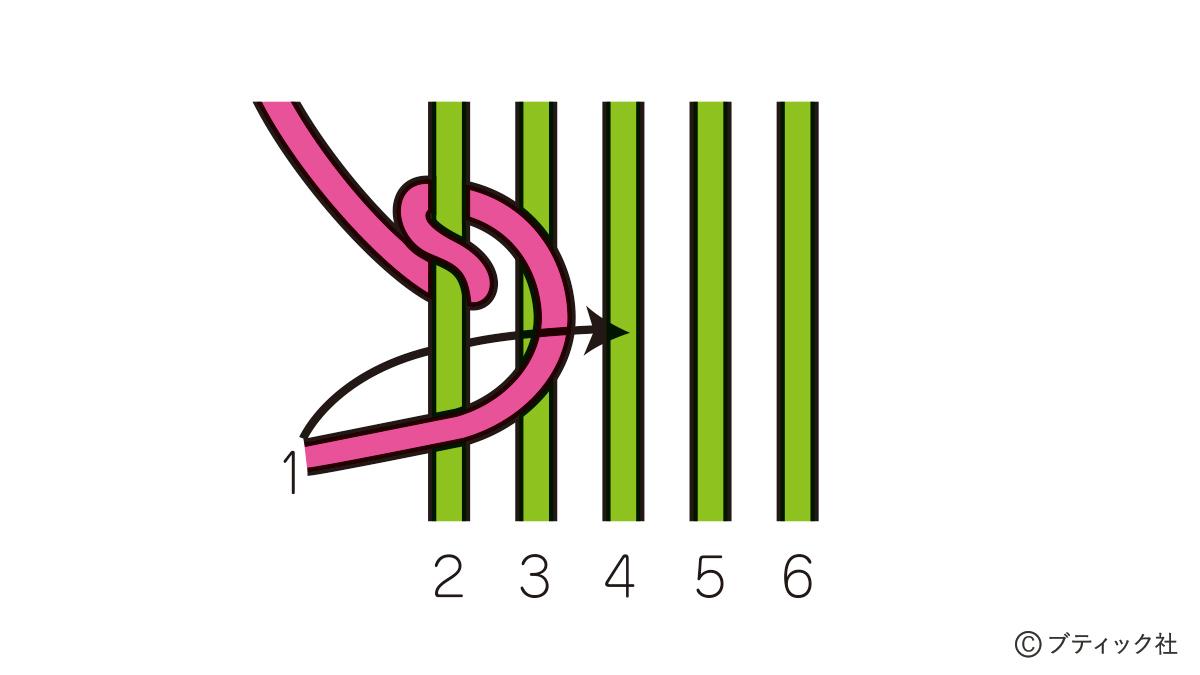
01 2の縦糸を芯糸にして、1の横糸を図のようにかけます。
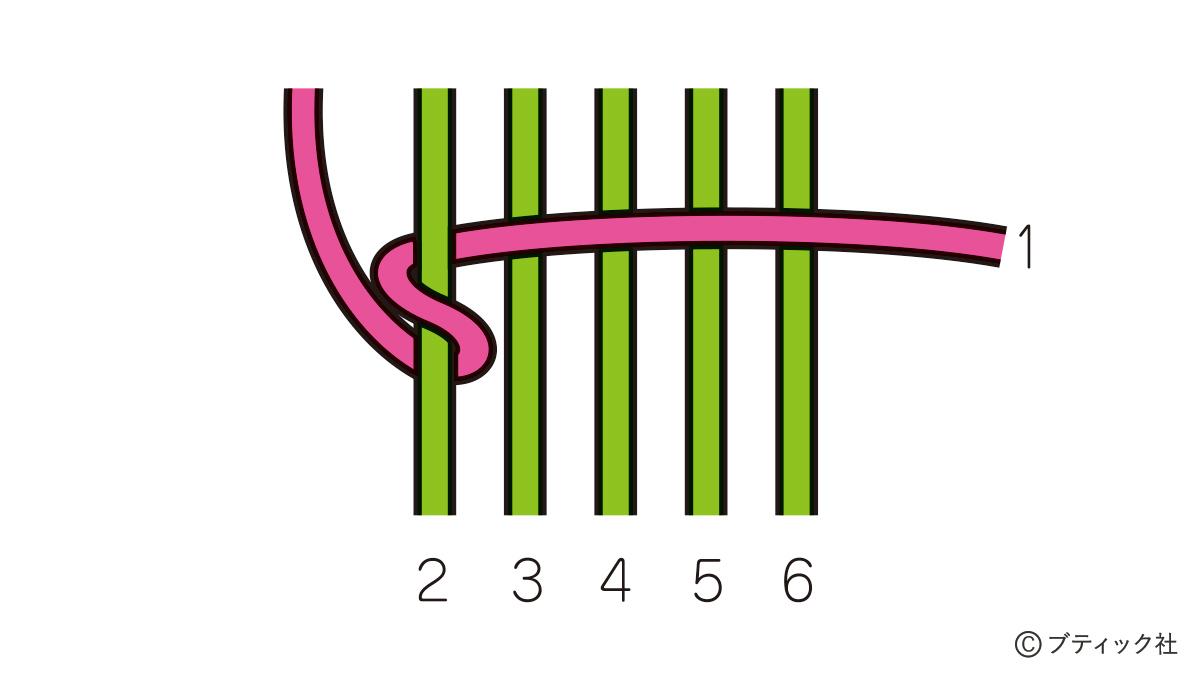
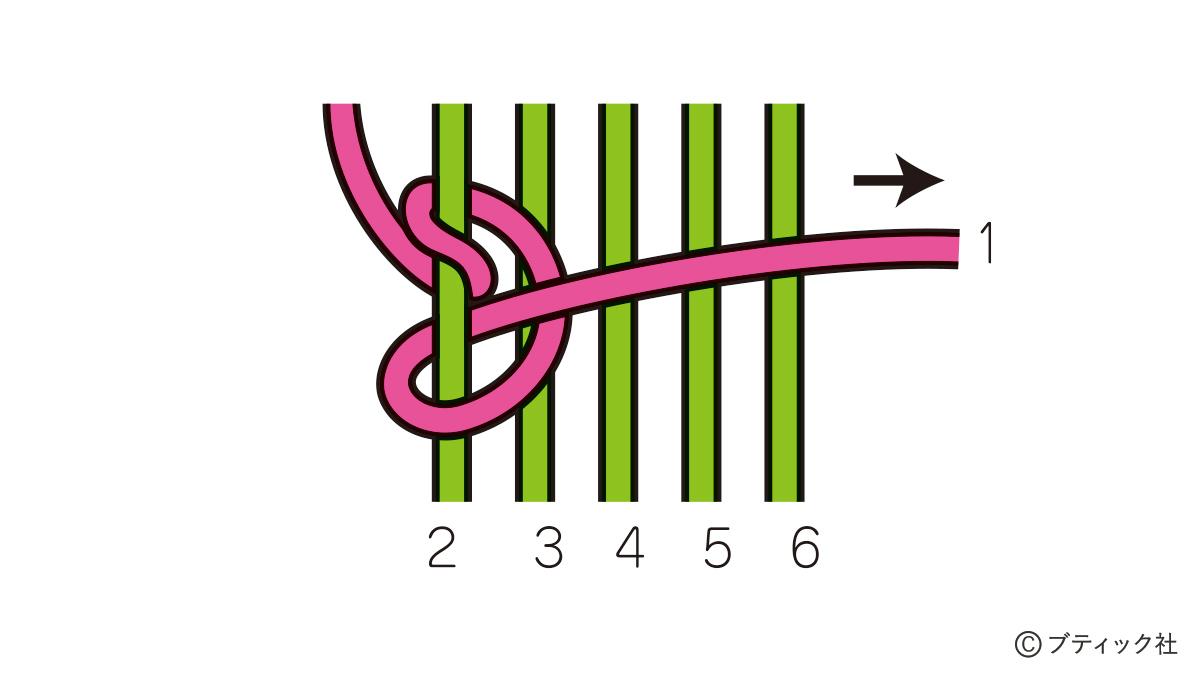
02 さらに1の横糸を矢印のようにかけます。
03 芯糸をピンと引きながら横糸を引きしめます。
04 1列めが終わり、次の列に移るときに折り返した部分の巻き糸があまり見えないように引きます。
2列めは左に向かって結んでいくので、巻き糸を1列めとは逆向きに結びます。