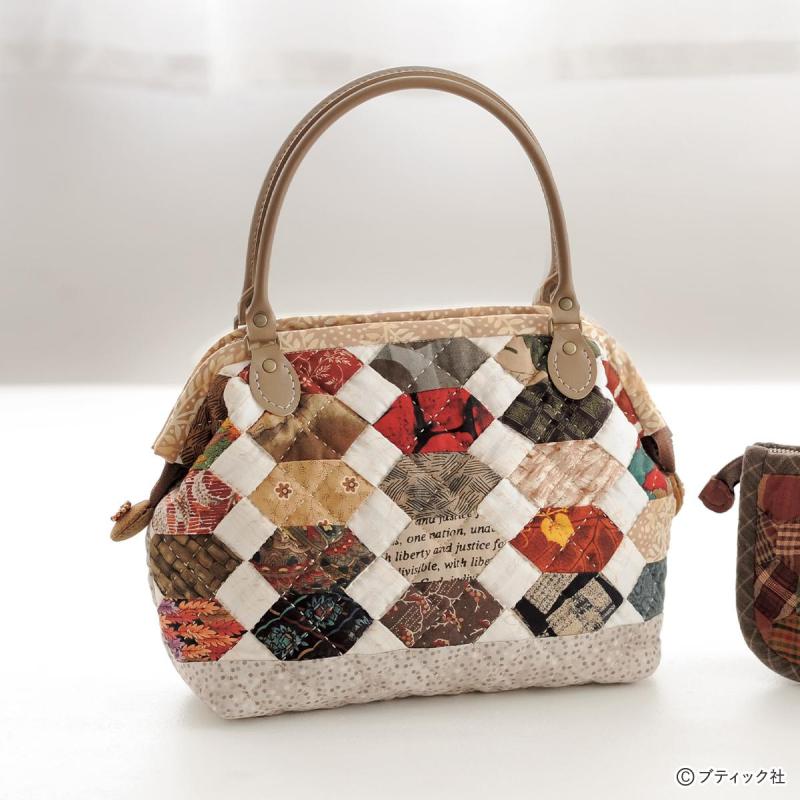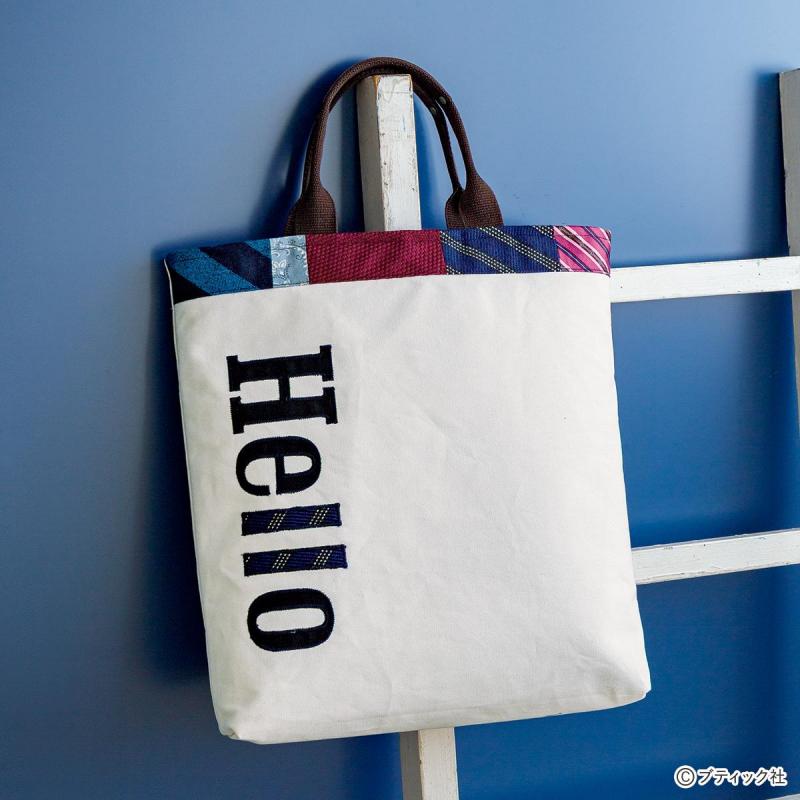


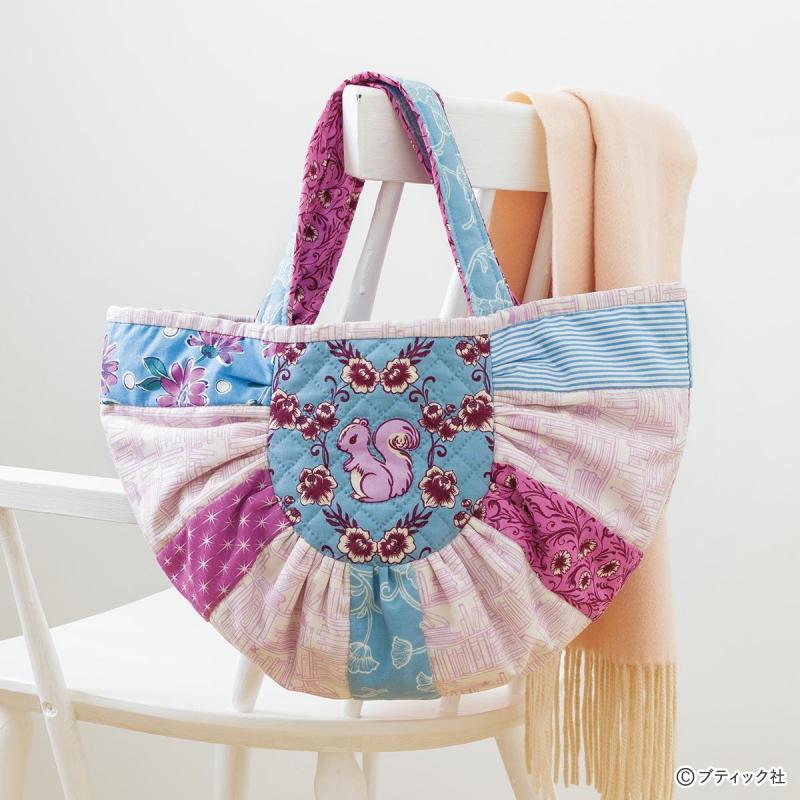

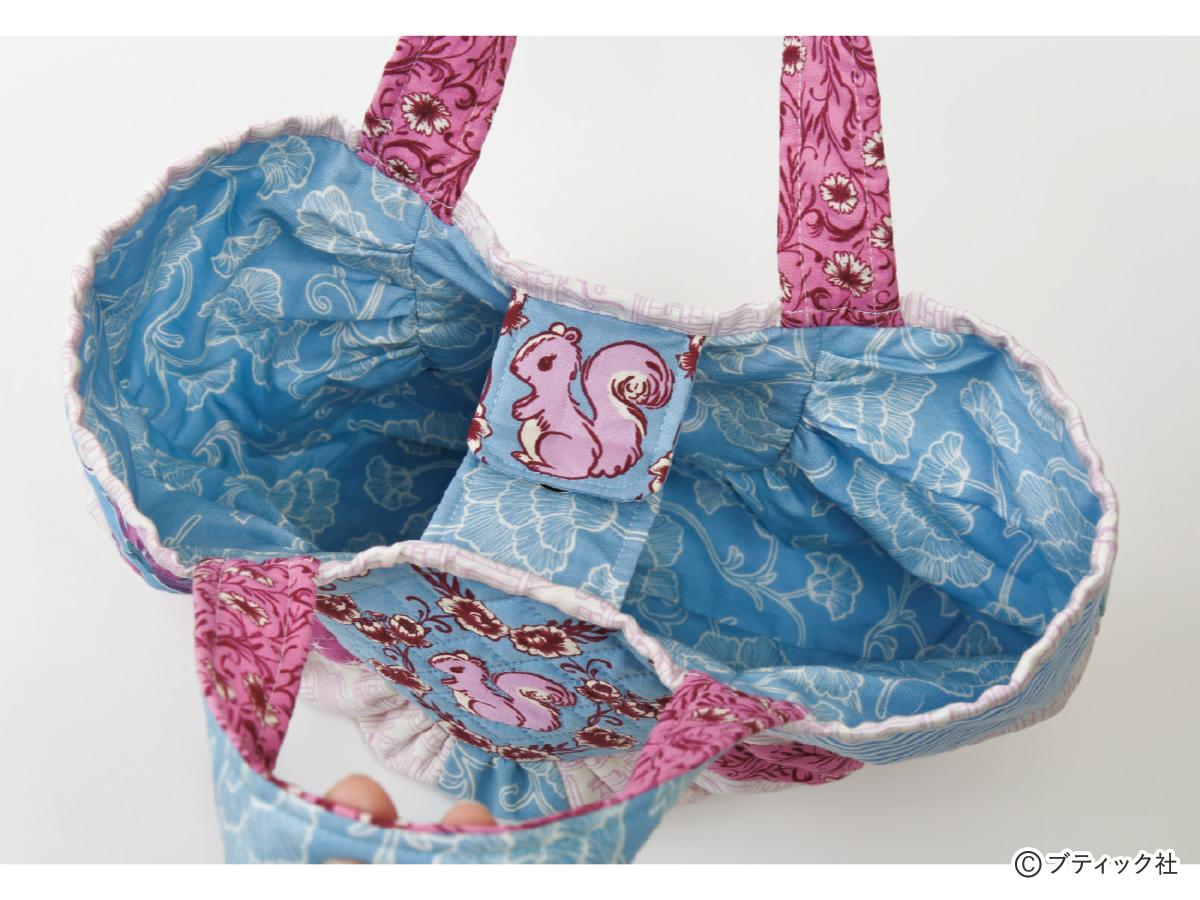
タブもリス柄にしてワンポイントに!
用尺と材料
★出来上がり寸法:26×39cm
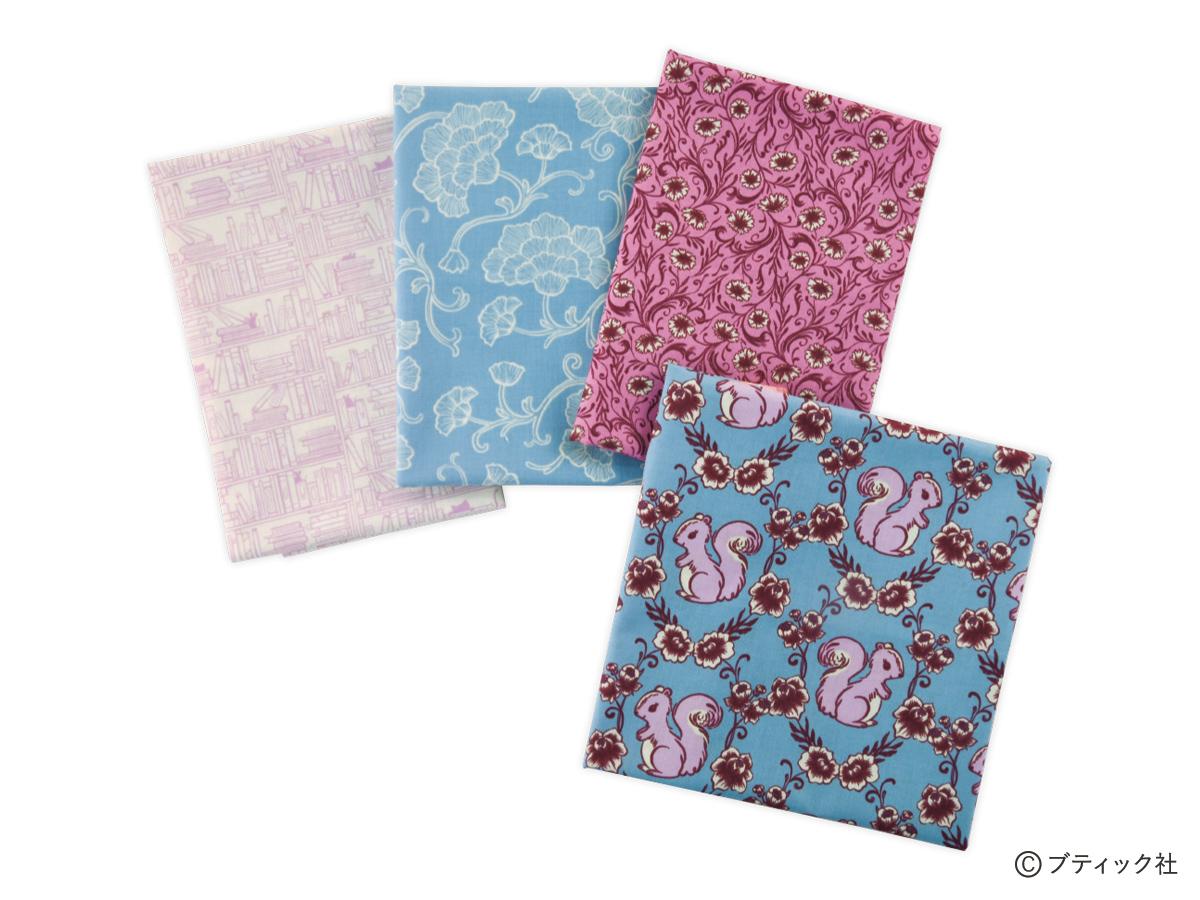
・A用はぎれ各種
・B用プリント 60×30cm(パイピング用布分含む)
・ヨーク用布 40×20cm(タブ表布分含む)
・持ち手B用布 35×15cm
・中袋用布 85×40cm(持ち手A用布、タブ裏布分含む)
・厚手片面接着キルト綿 40×25cm
・薄手片面接着キルト綿 70×30cm
・裏打ち布 85×30cm
・直径2cm縫い付け型マグネットボタン 1組
作り方順序
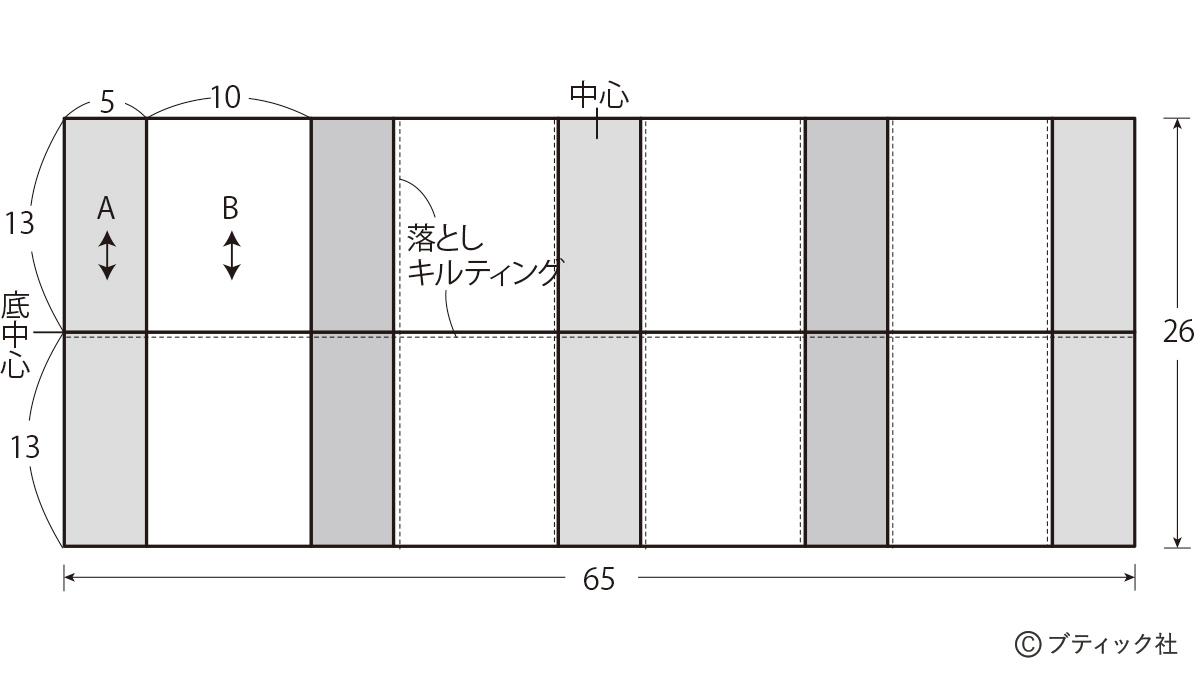
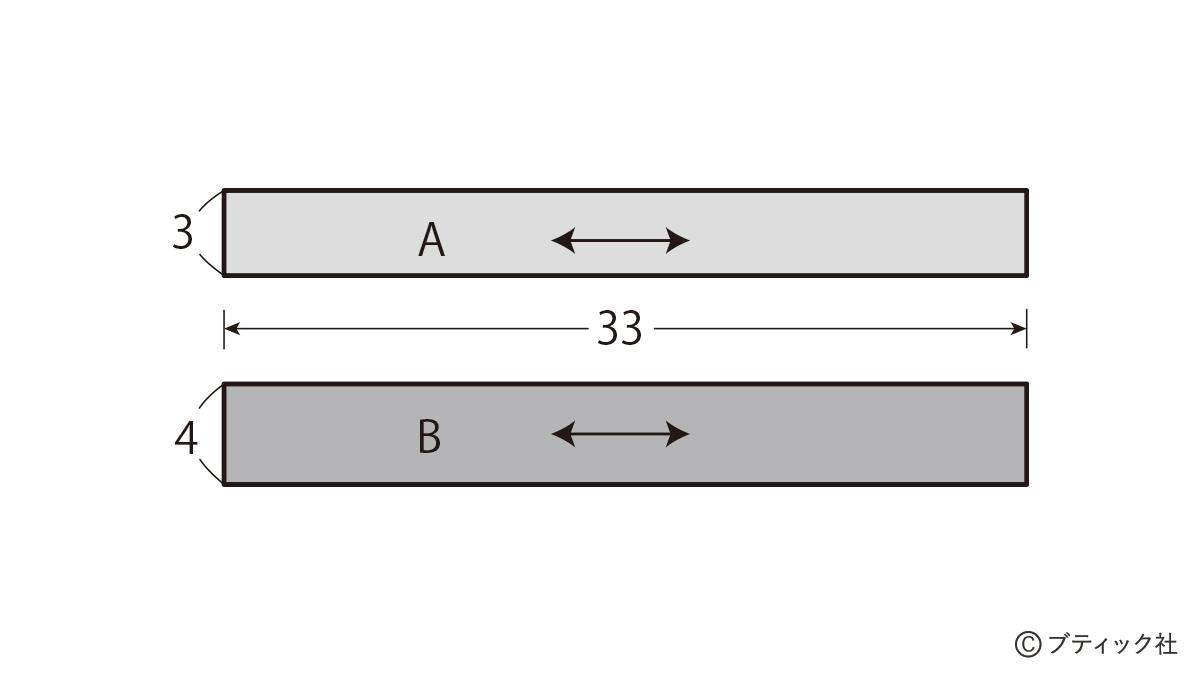
01 AとBを接いで本体表布を作る
02 キルト綿を貼り、裏打ち布を重ねてキルティングする
03 持ち手、タブ、ヨークを作る
04 以下、図のように仕立てる。
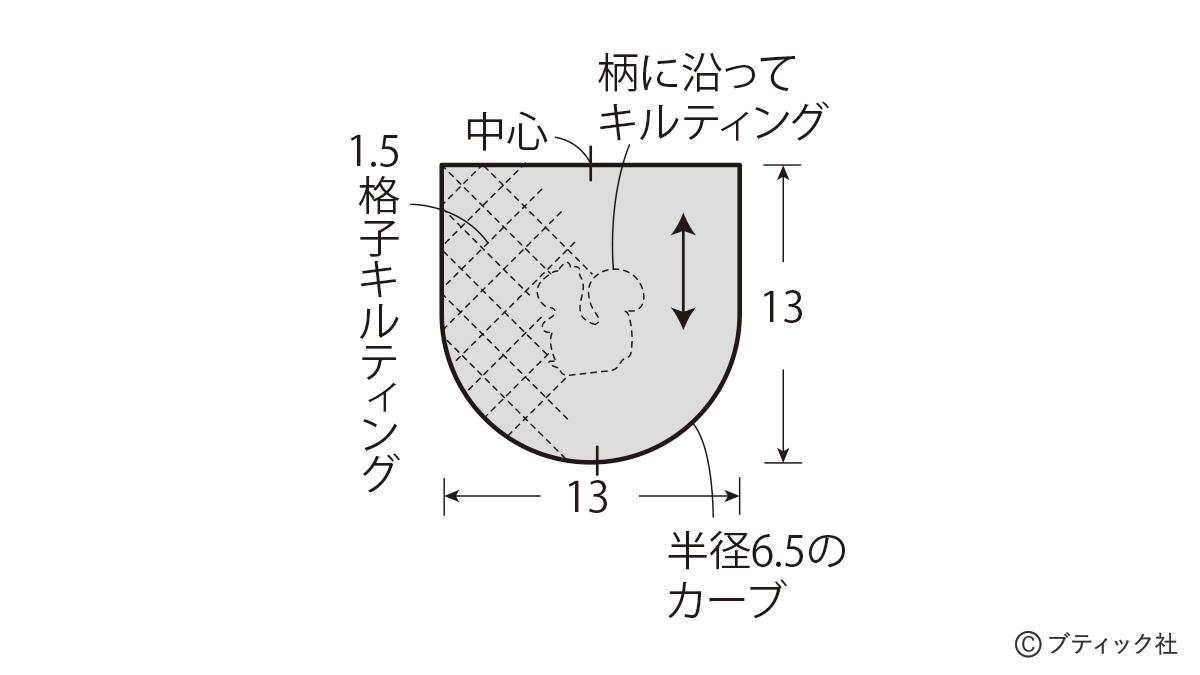
製図
【本体】
※中袋は同寸の一枚布
【ヨーク(2枚)】
※中袋同寸
【持ち手用布2種(各2枚)】
【タブ(表・裏布各2枚)】
※表布の一枚は裏布と共布

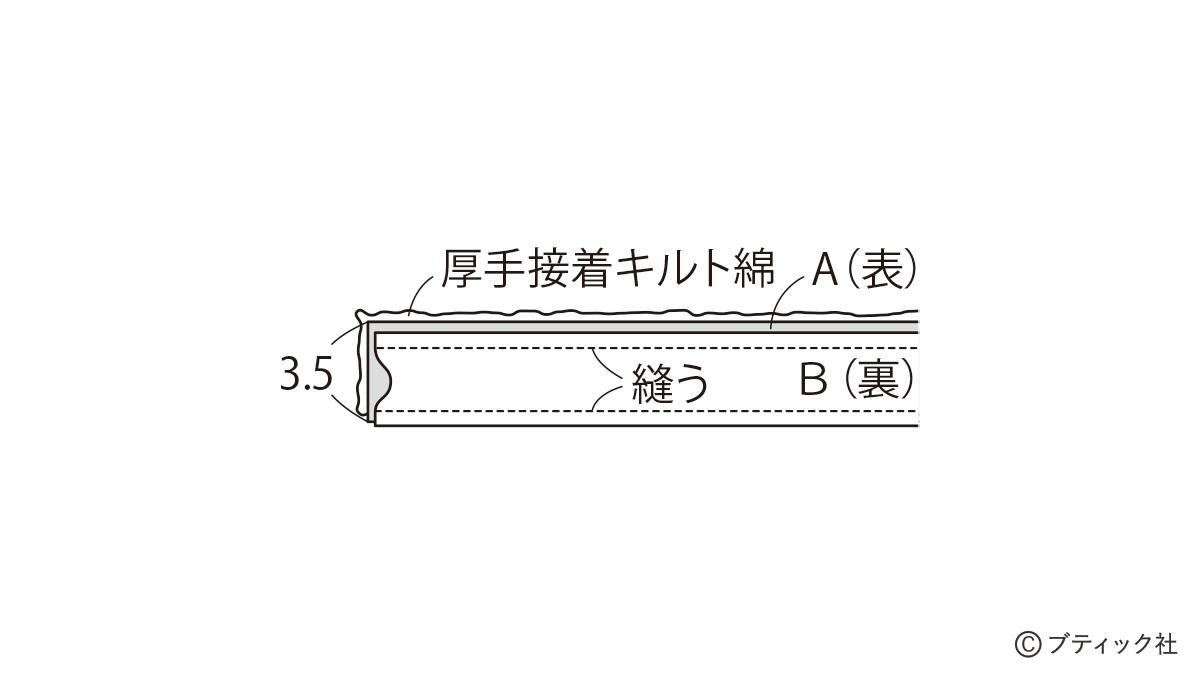
持ち手の作り方
01 Aの裏にキルト綿を貼り、Bを中表に重ねて筒状に縫う