


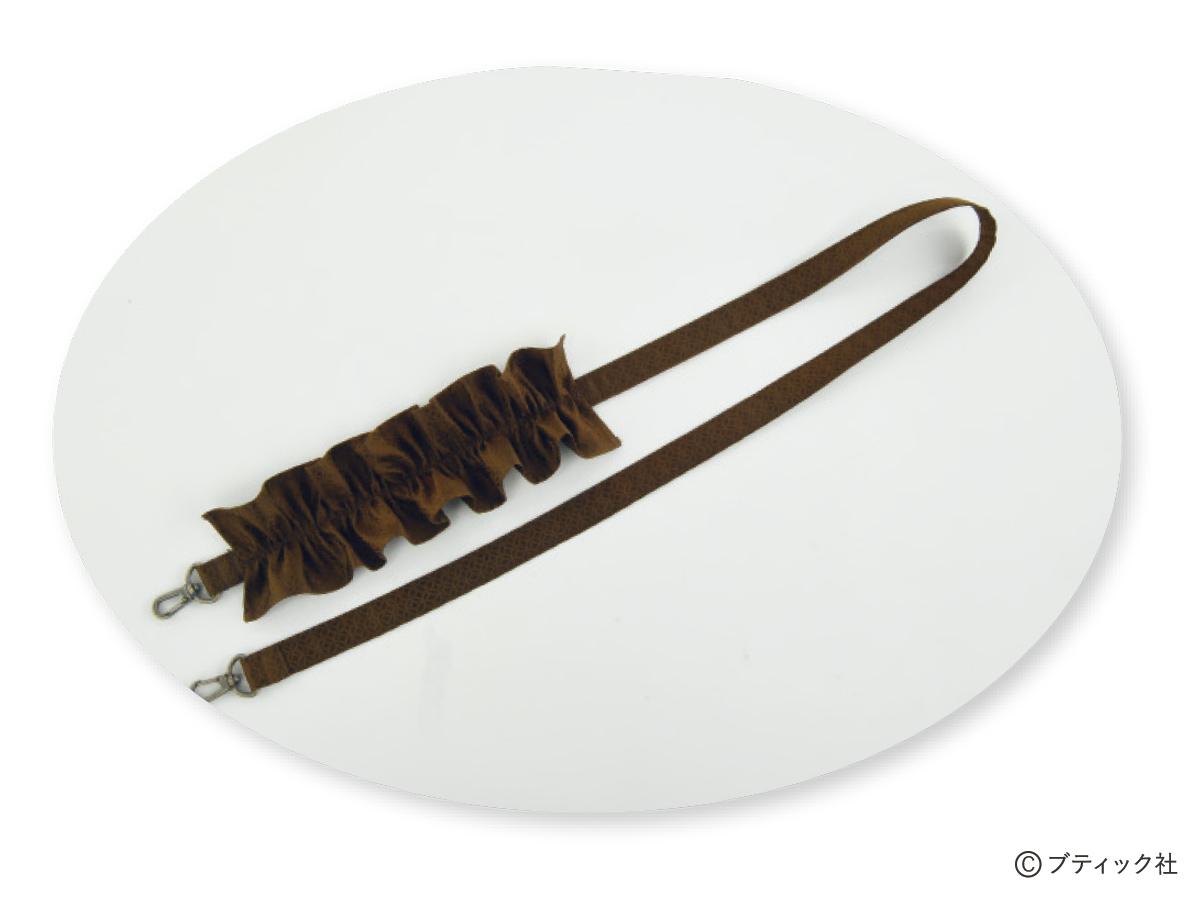
必要な材料
・表布(半幅帯(はんはばおび))25cm幅 1m20cm
・接着芯 10cm幅 1m20cm
・ナスカン(テープ幅20mm用)2個
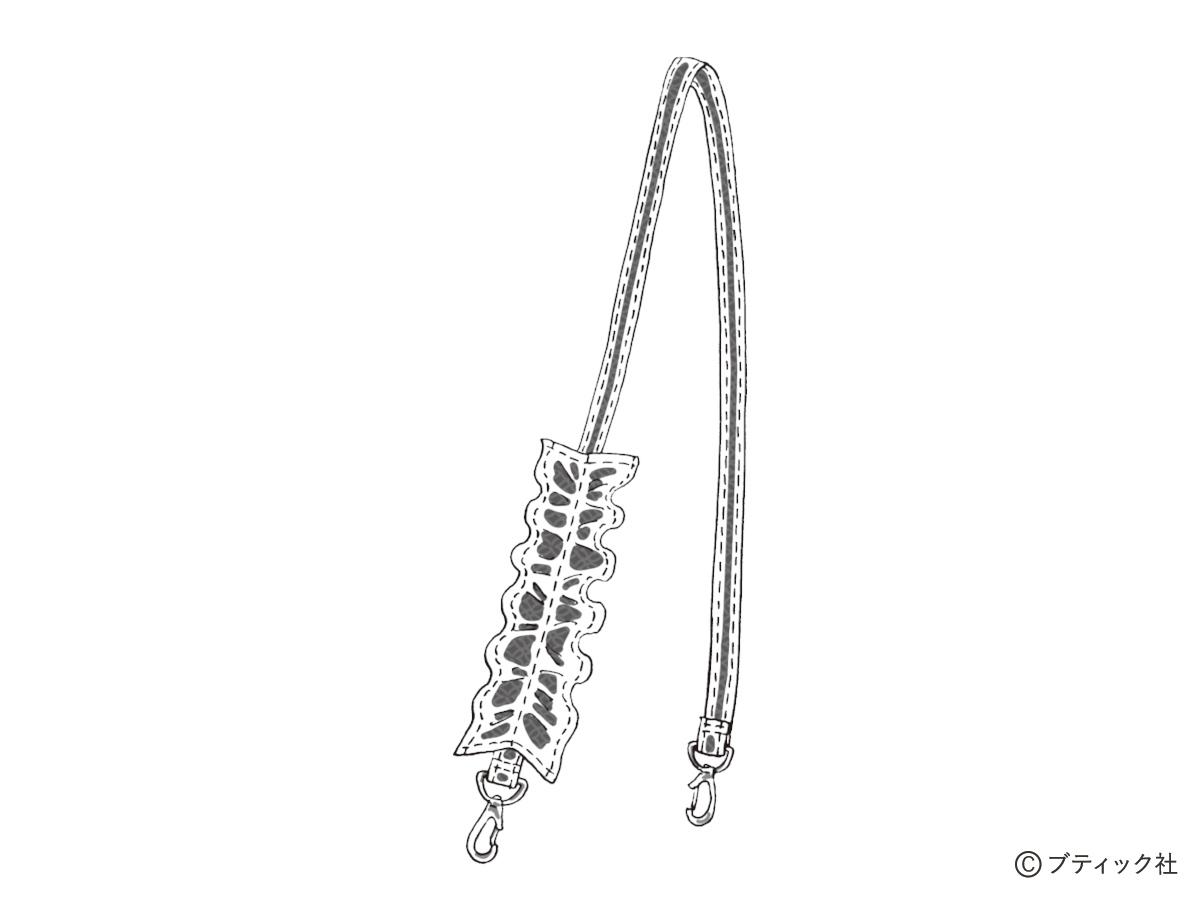
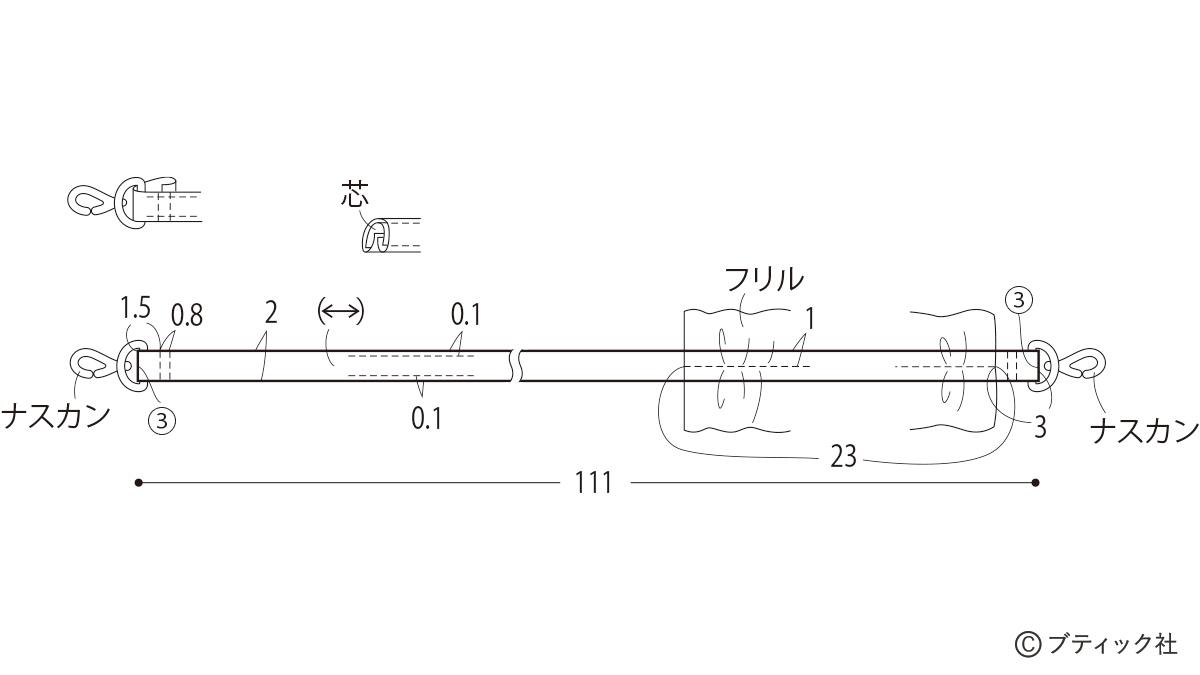
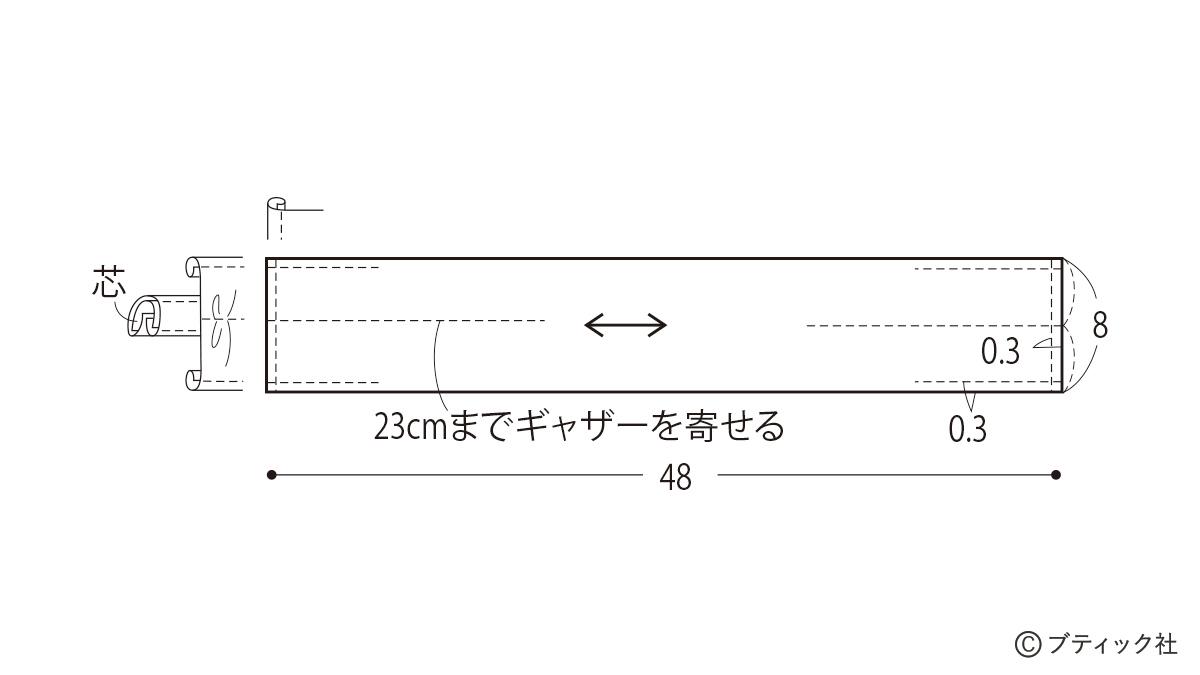
製図
※長さ:118cm(金具を含む全長)
※○の中の数字は縫い代寸法です。指定以外は1cmの縫い代をつけて裁ちます。
【本体(表布、接着芯 各1枚)】
【フリル(表布 1枚)】
作り方
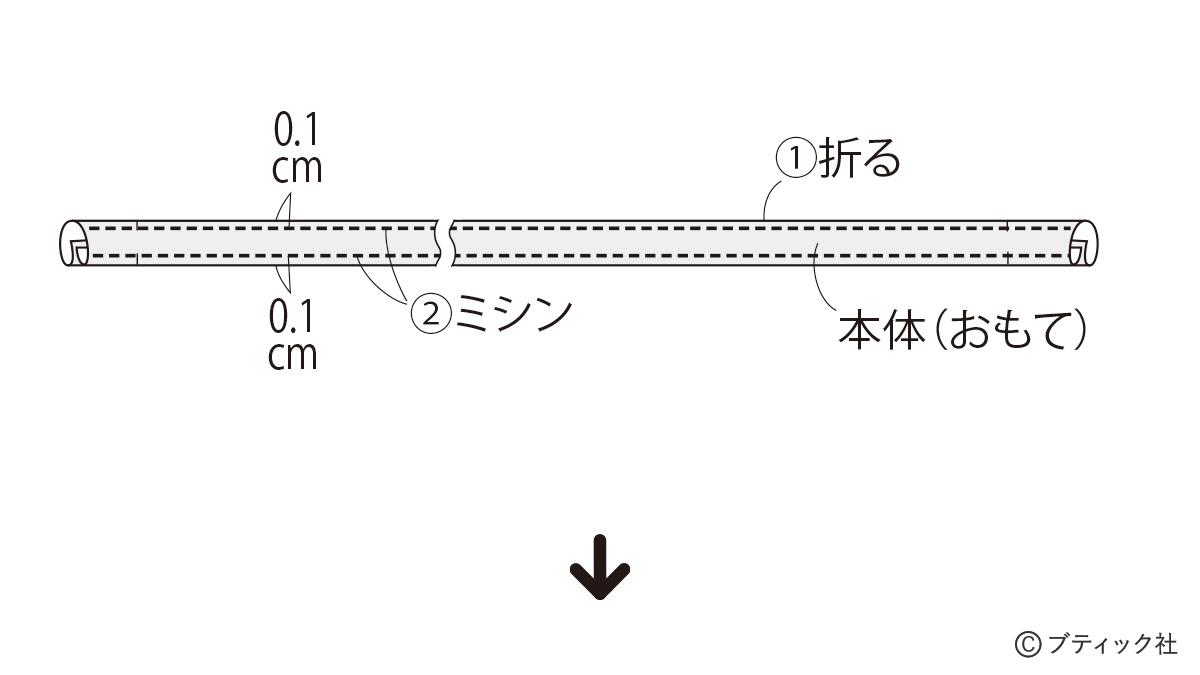
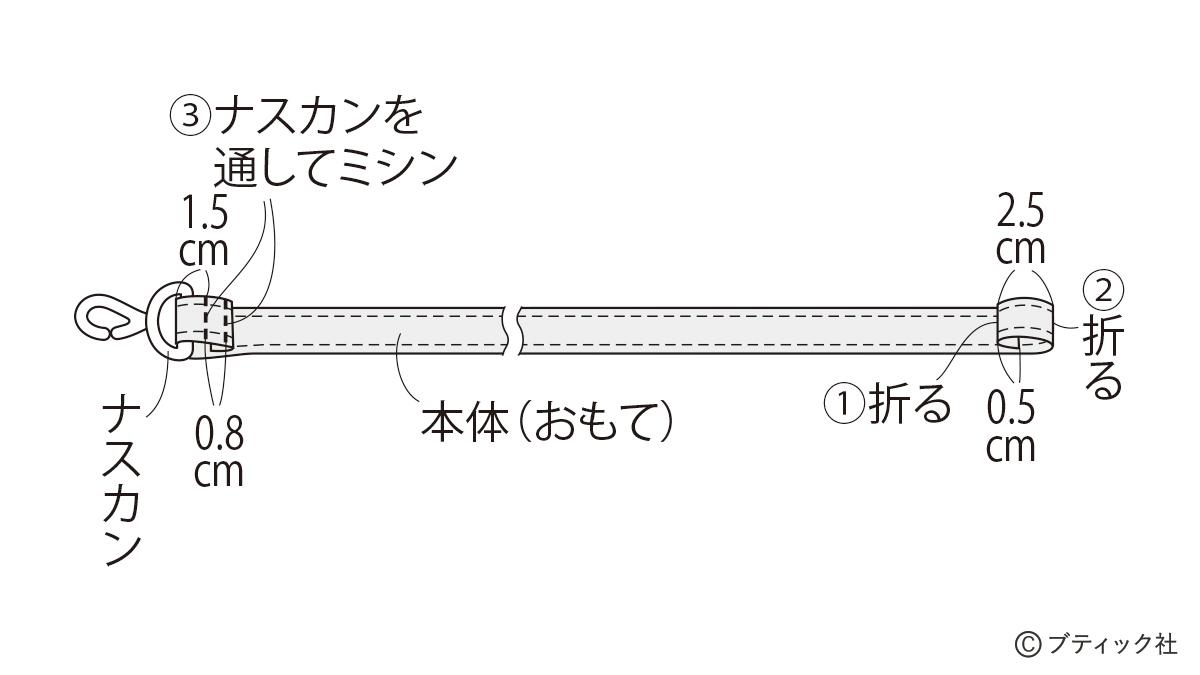
01 本体を作る
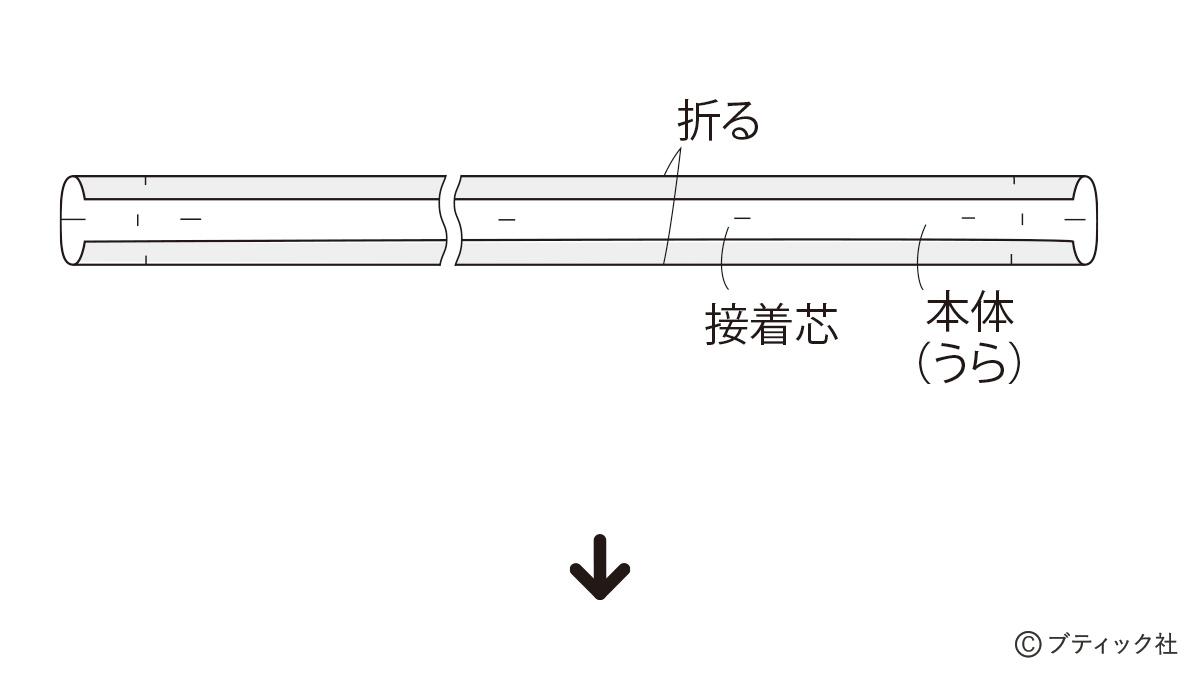
※反対側にも同様にナスカンを通す
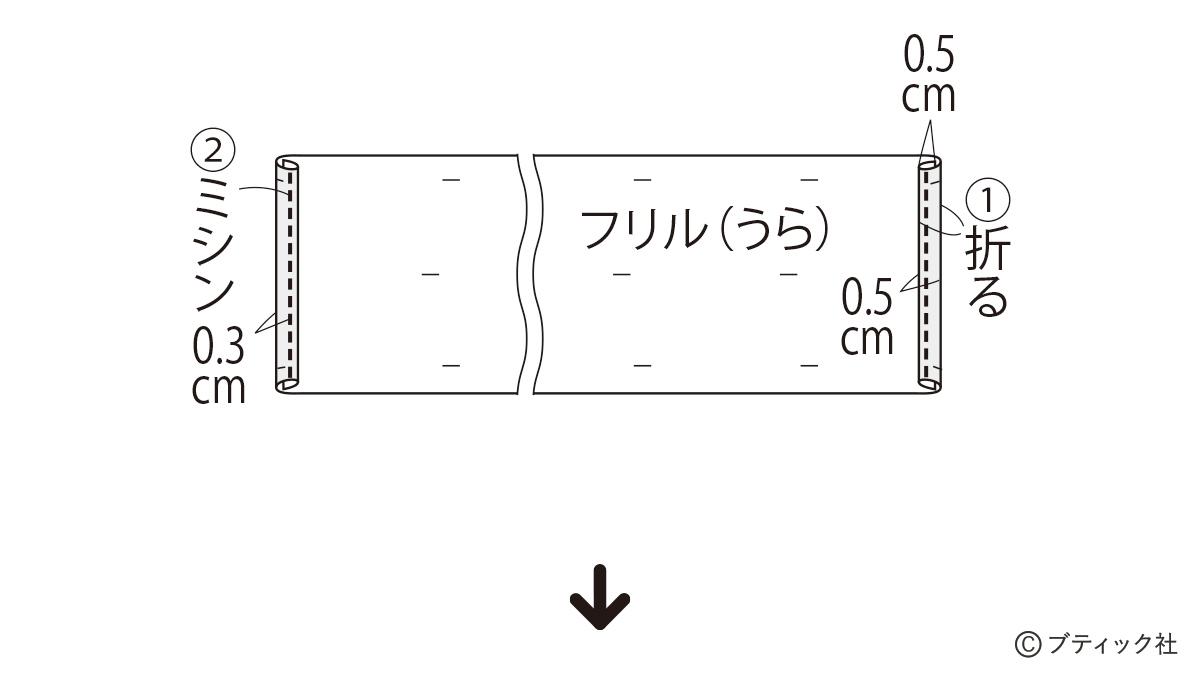
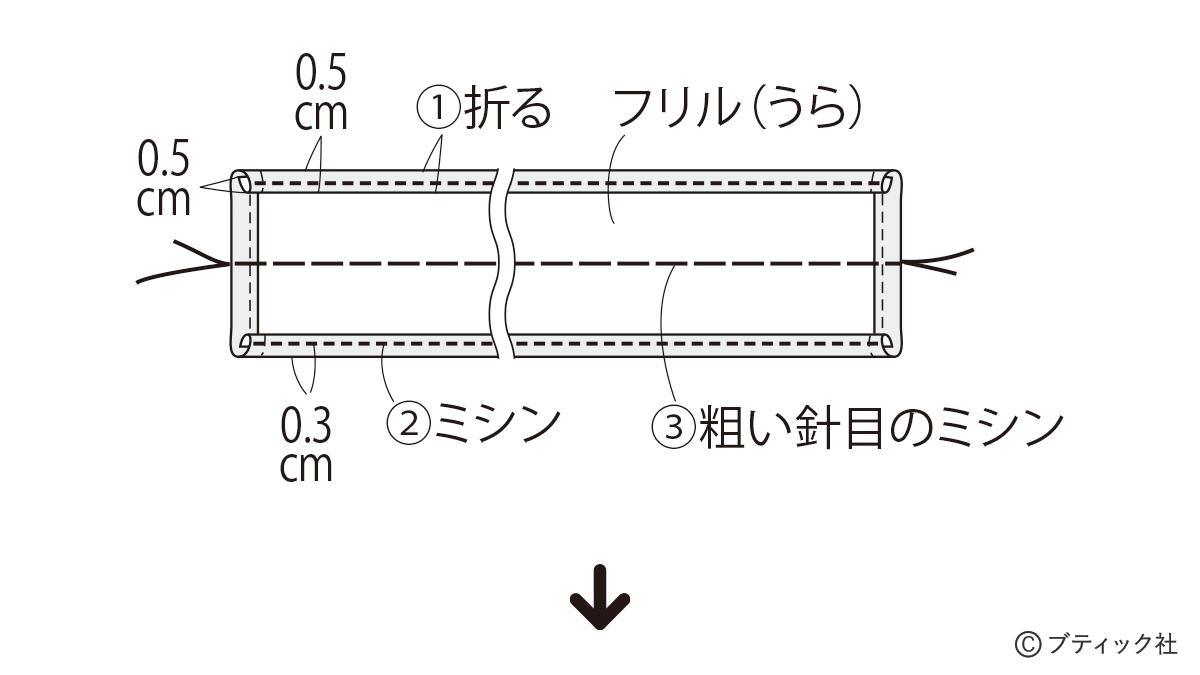
02 フリルを作る