


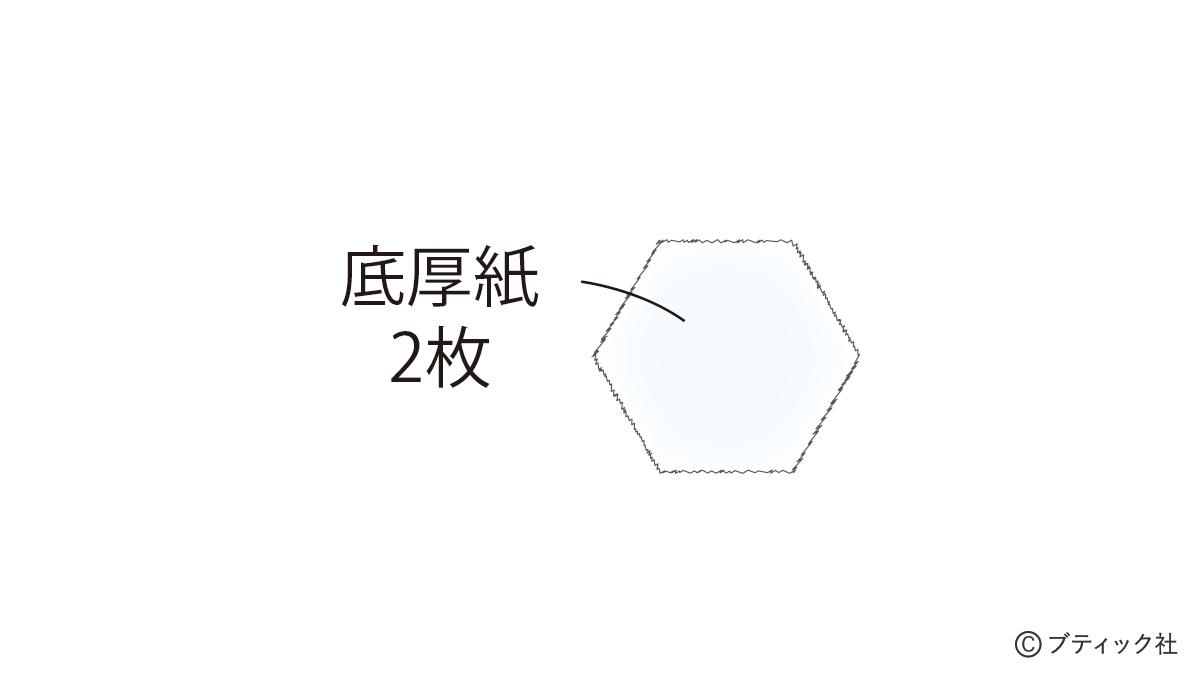
【底厚紙2枚】
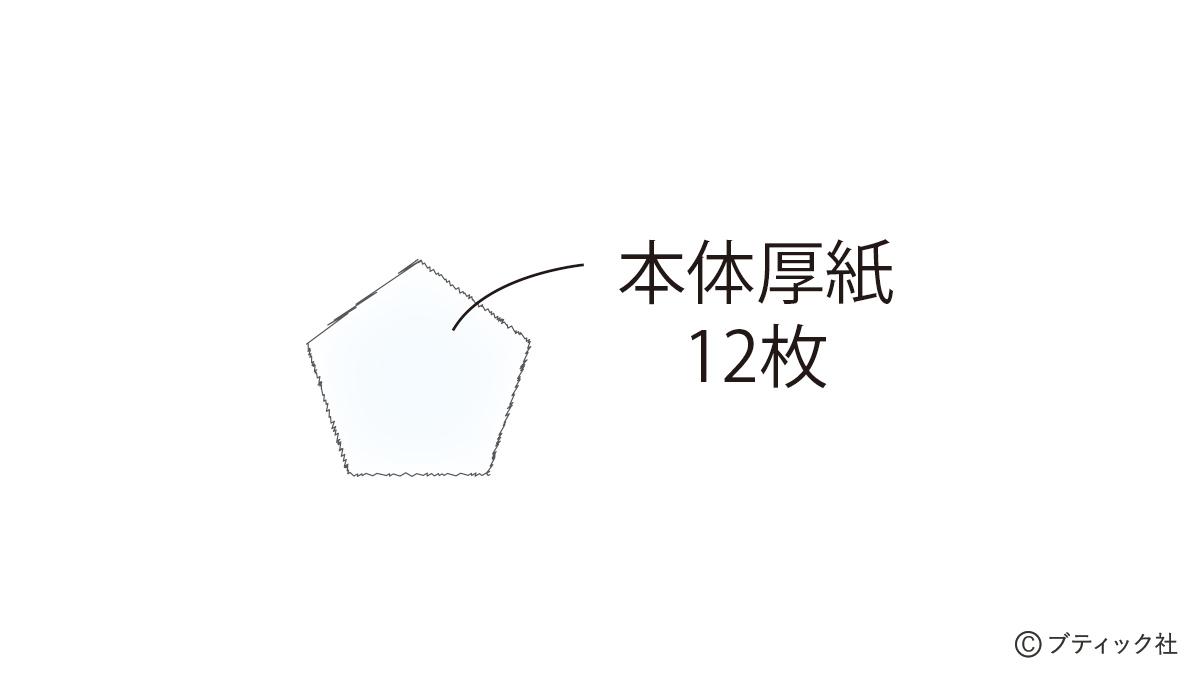
【本体厚紙12枚】
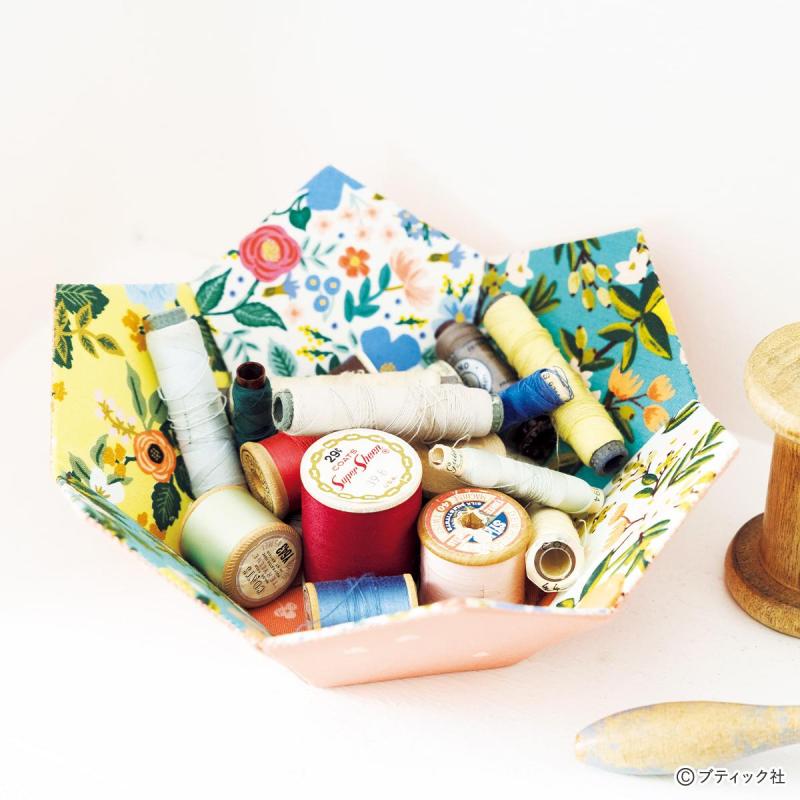
02 パーツを作る
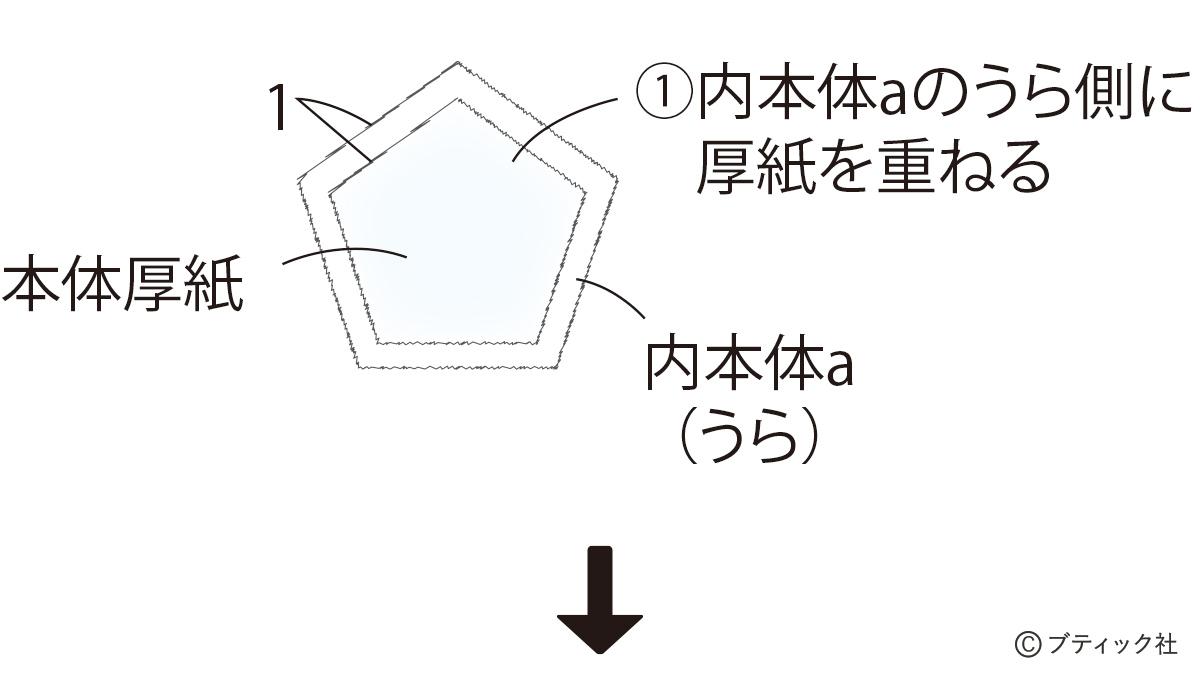
【内本体a・外本体】
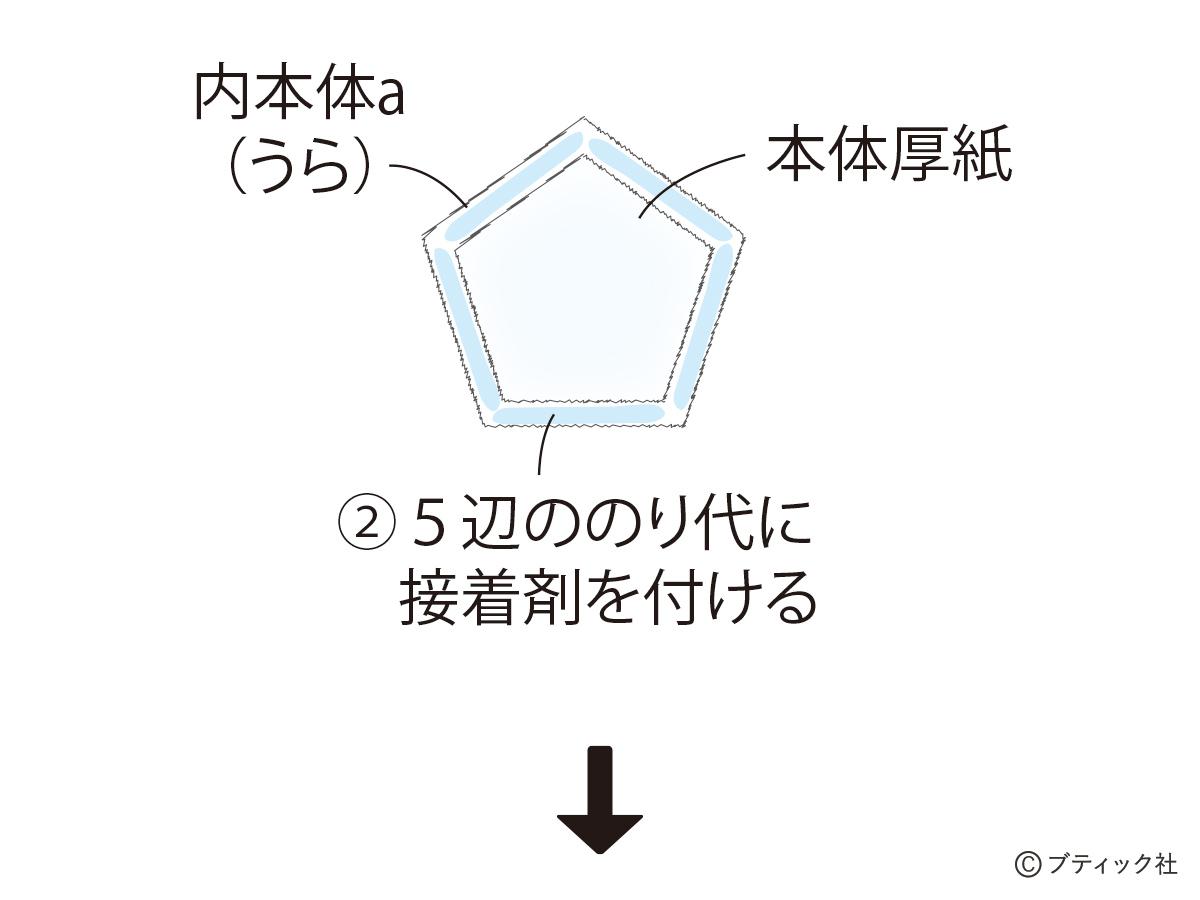
①内本体aの裏側に厚紙を重ねる
②5辺ののり代に接着剤を付ける
③厚紙に沿ってのり代を折って貼る
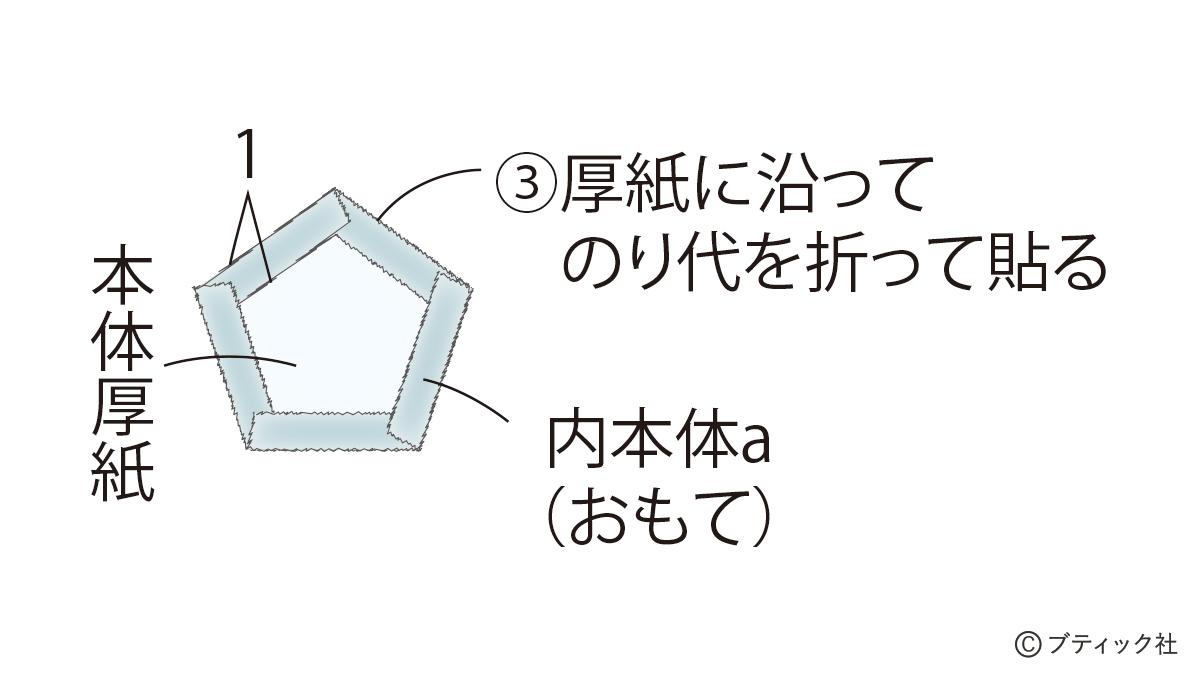
※内本体a3枚、外本体6枚を同様に作る
【内本体b】
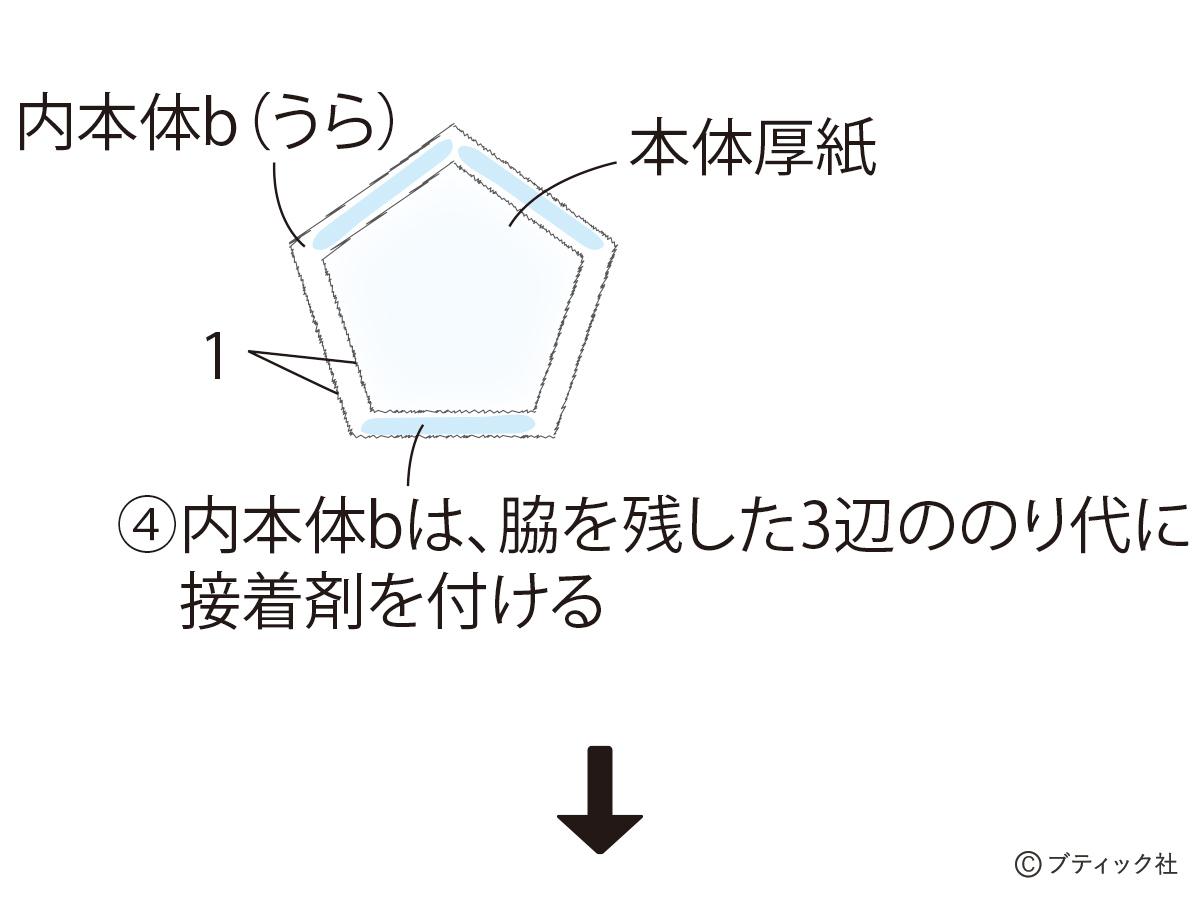
④内本体bは、脇を残した3編ののり代に接着剤を付ける
⑤3辺を厚紙に沿って折って、貼る
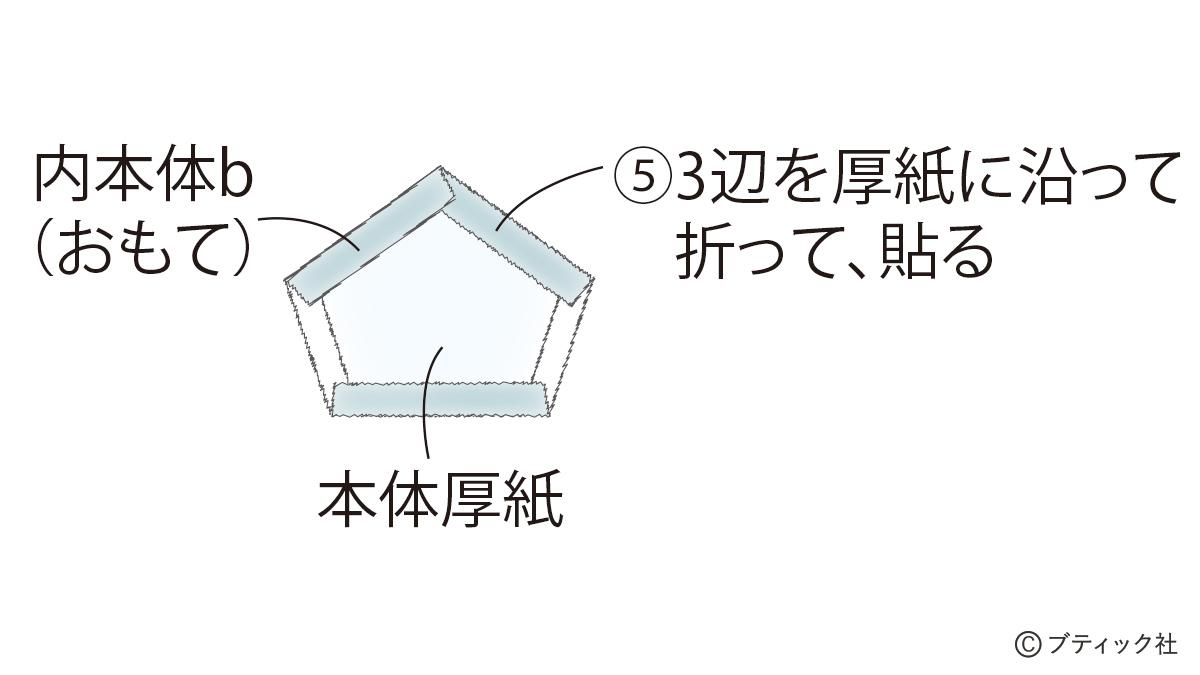
※3枚作る
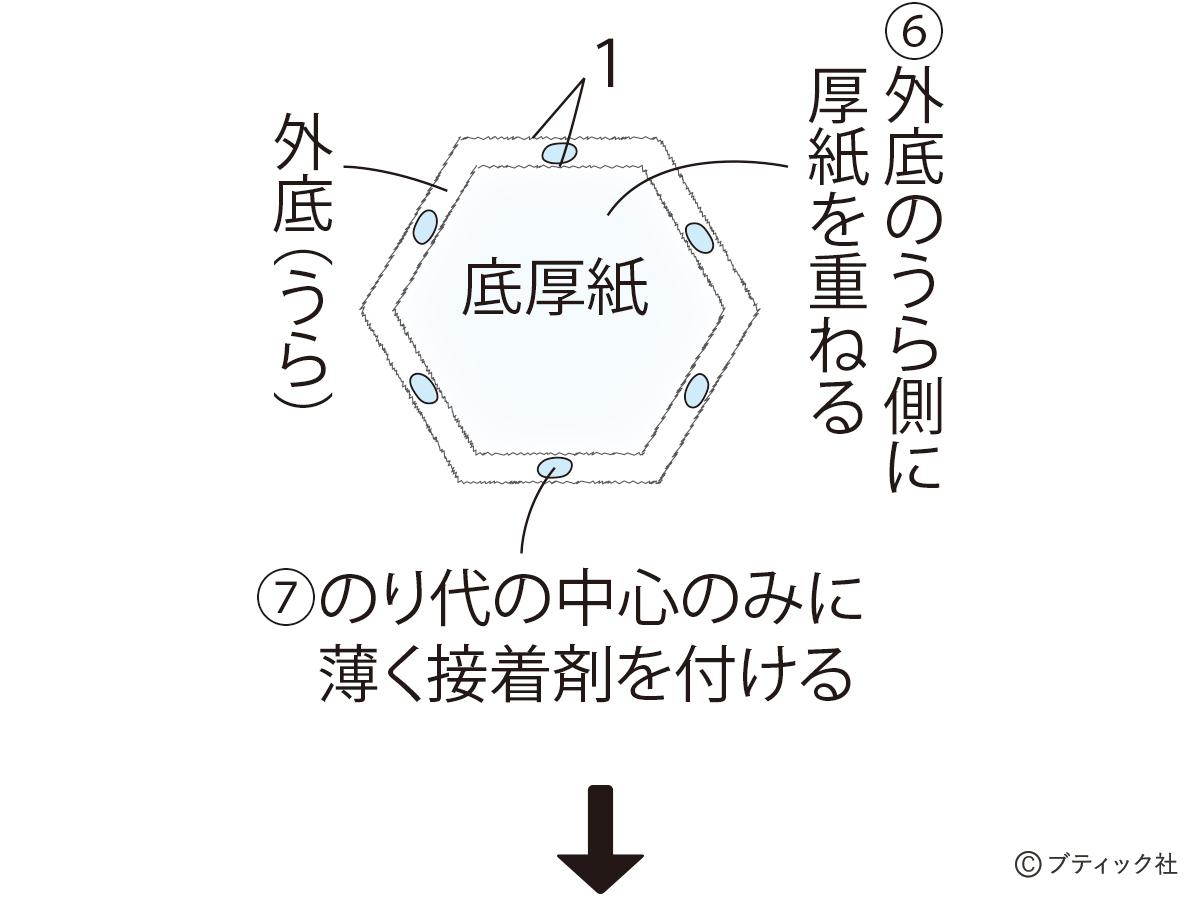
【外底】
⑥外底のうら側に厚紙を重ねる
⑦のり代の中心のみに薄く接着剤を付ける
⑧厚紙に沿って折り、貼る(後で外すので軽く止める)