


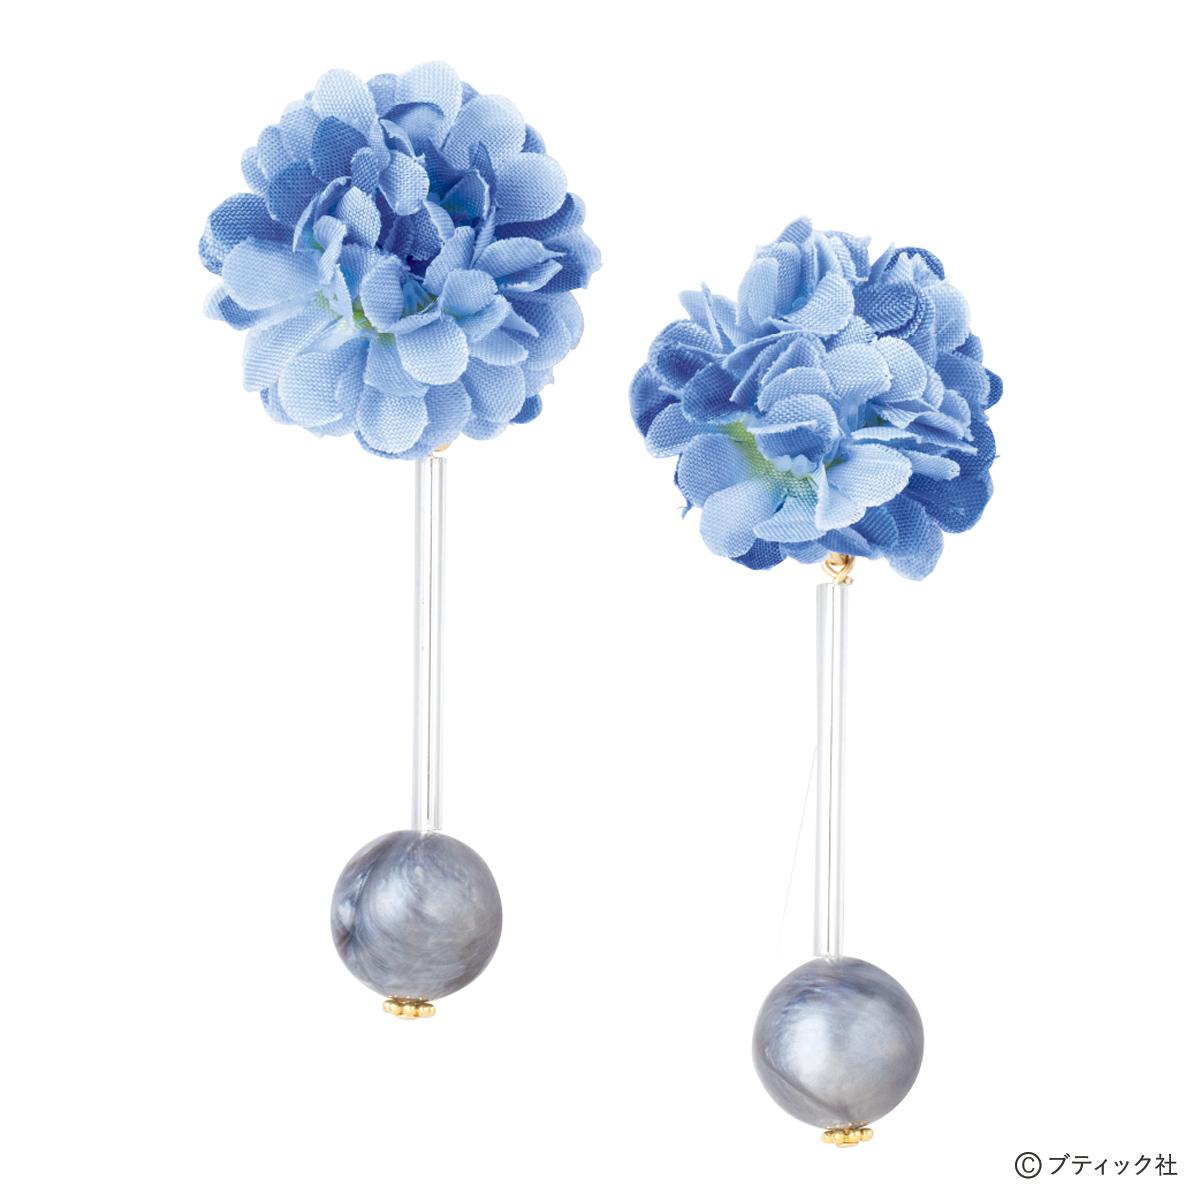
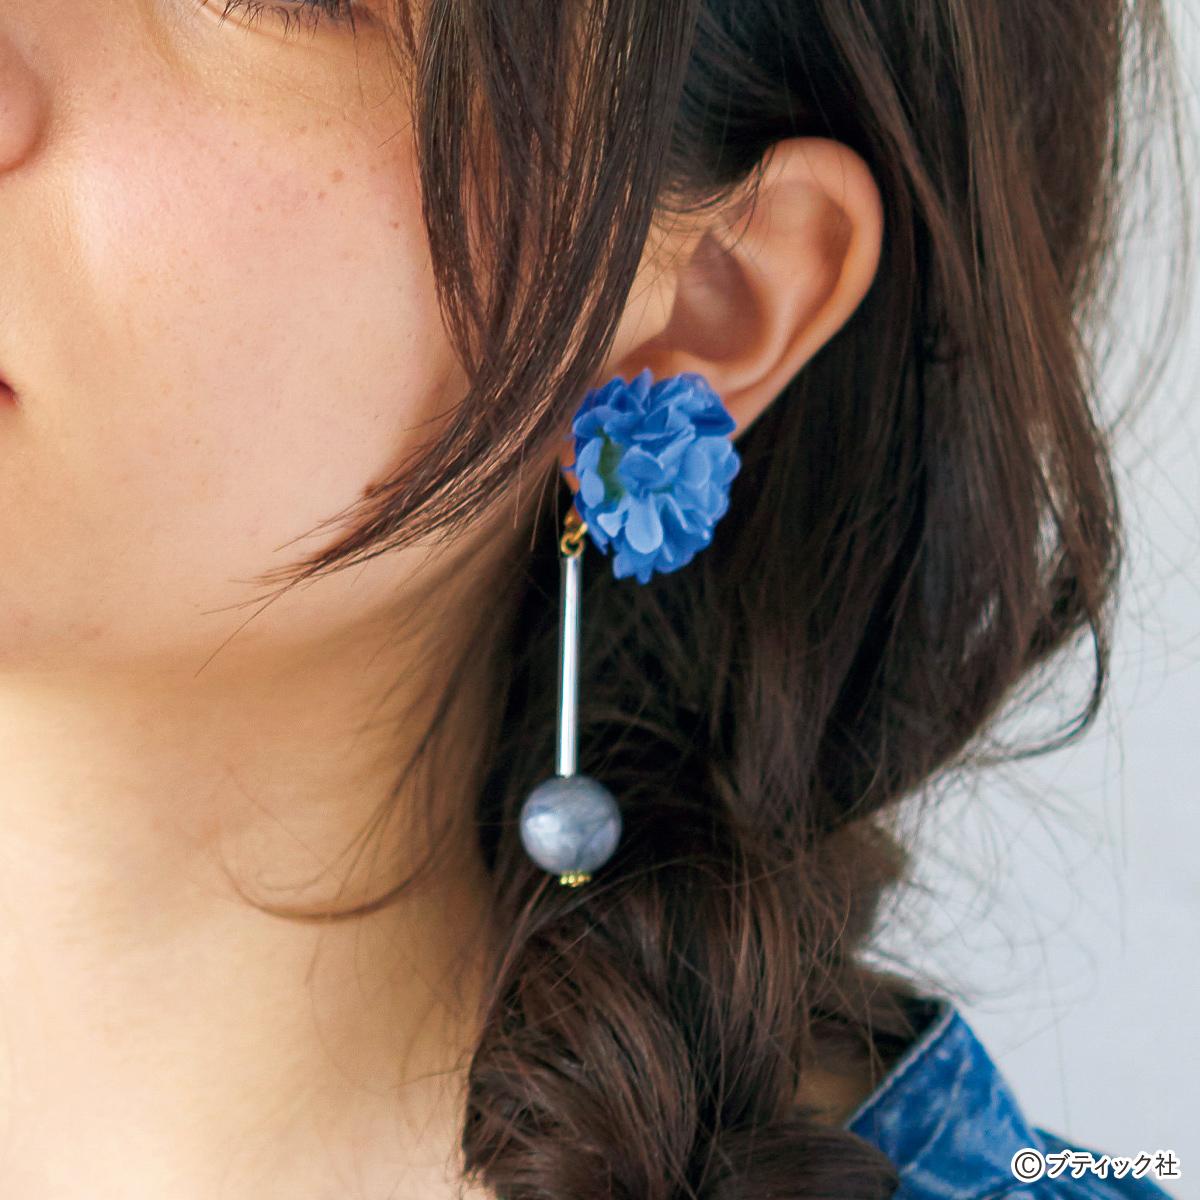
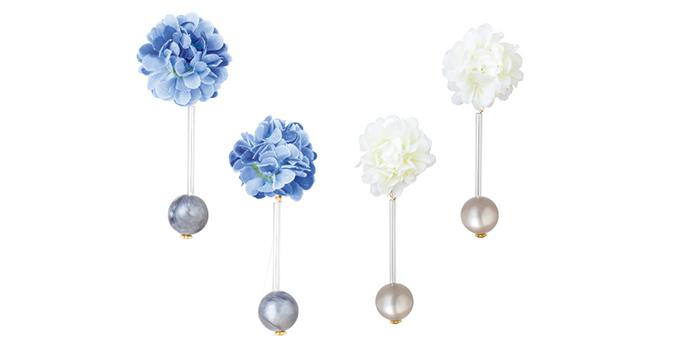
カジュアルなデニムコーデにおすすめ!かわいいお花のイヤリングの材料
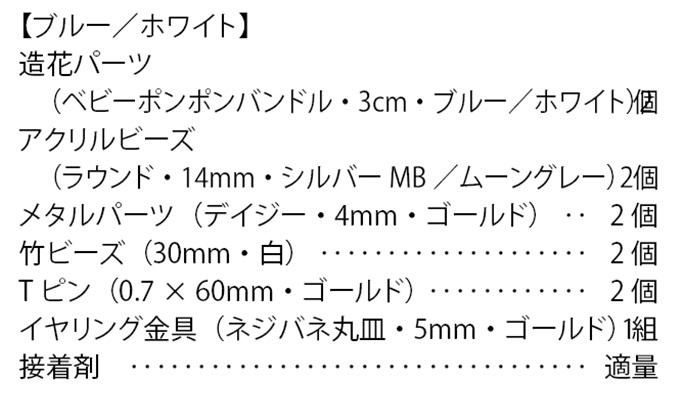
【ブルー/ホワイト】
造花パーツ
(ベビーポンポンバンドル・3cm・ブルー/ホワイト)…個
アクリルビーズ
(ラウンド・14mm・シルバー MB/ムーングレー)…2個
メタルパーツ(デイジー・4mm・ゴールド)…2個
竹ビーズ(30mm・白)…2個
Tピン(0.7×60mm・ゴールド)…2個
イヤリング金具(ネジバネ丸皿・5mm・ゴールド)…1組
接着剤…適量
カジュアルなデニムコーデにおすすめ!かわいいお花のイヤリングの作り方
【ブルー】 【ホワイト】

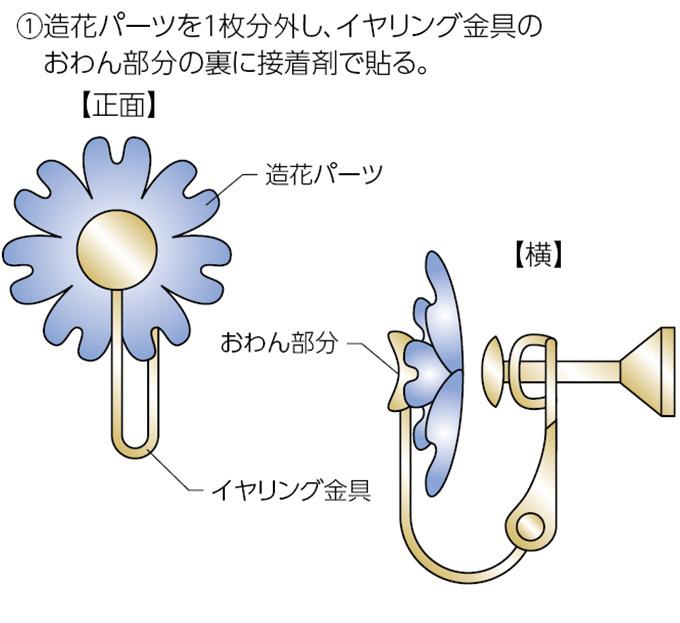
①造花パーツを1枚分外し、イヤリング金具のおわん部分の裏に接着剤で貼る。
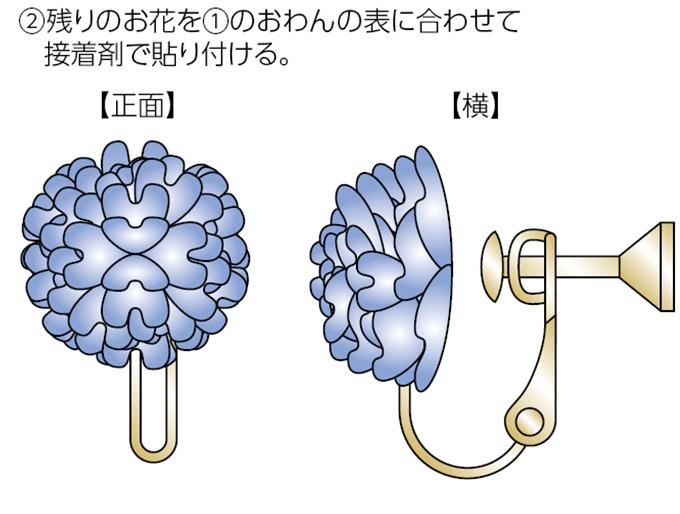
②残りのお花を①のおわんの表に合わせて接着剤で貼りつける。
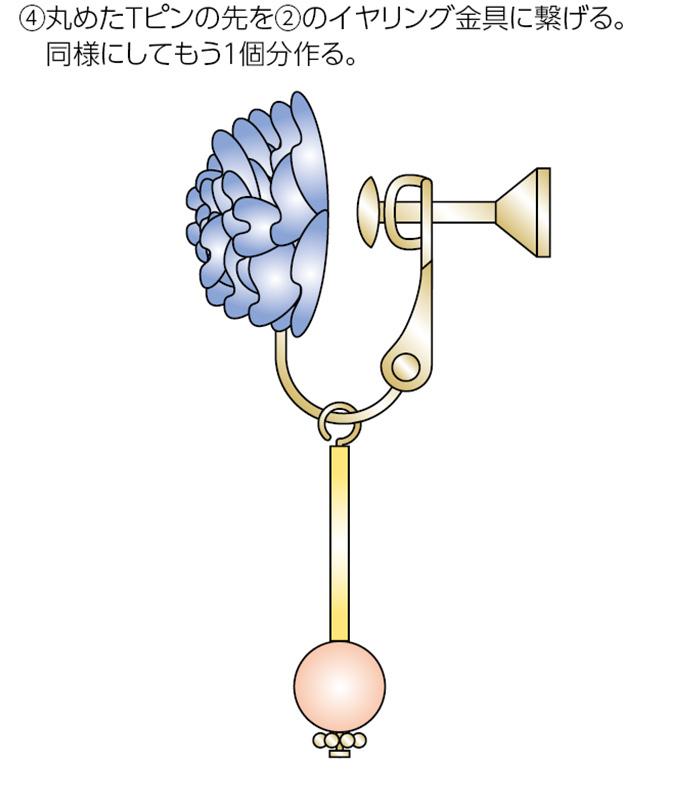
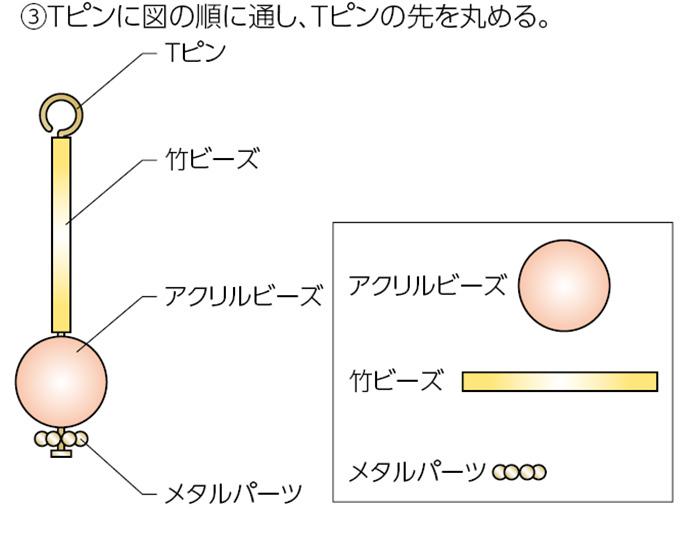
③Tピンに図の順に通し、Tピンの先を丸める。
④丸めたTピンの先を②のイヤリング金具に繋げる。同様にしてもう1個分作る。