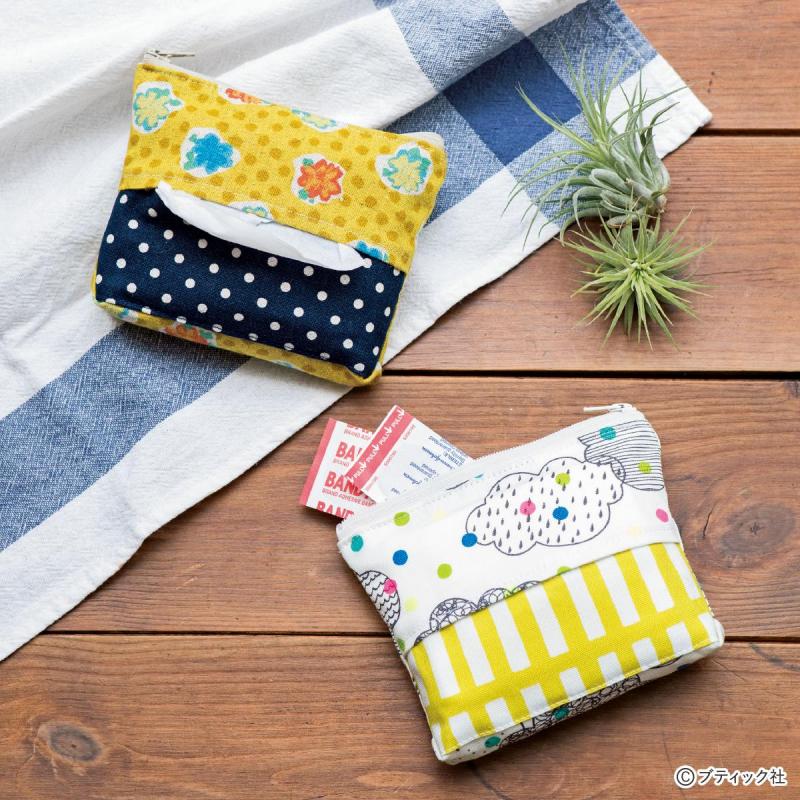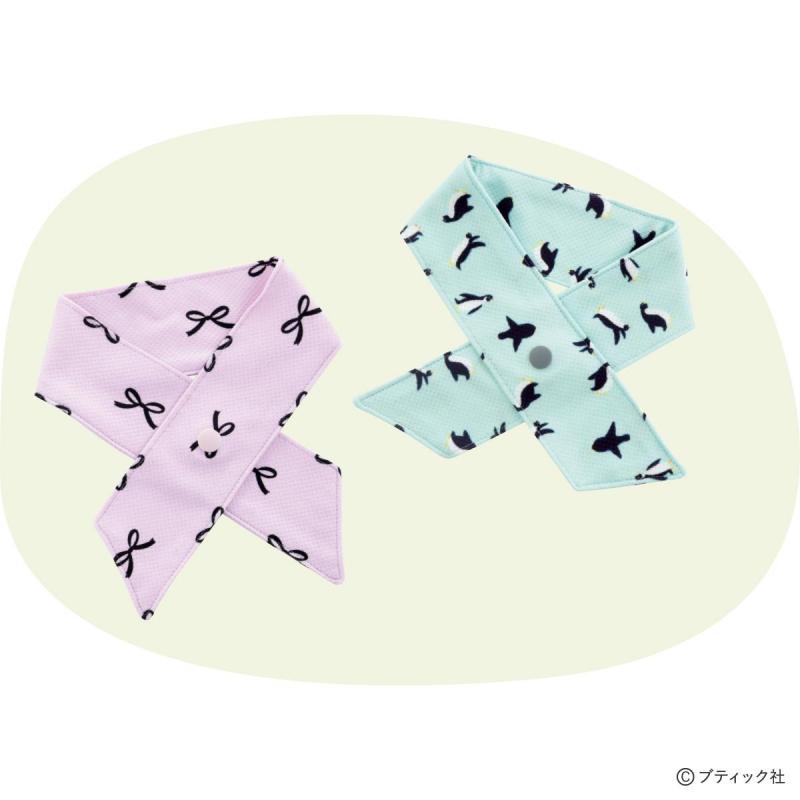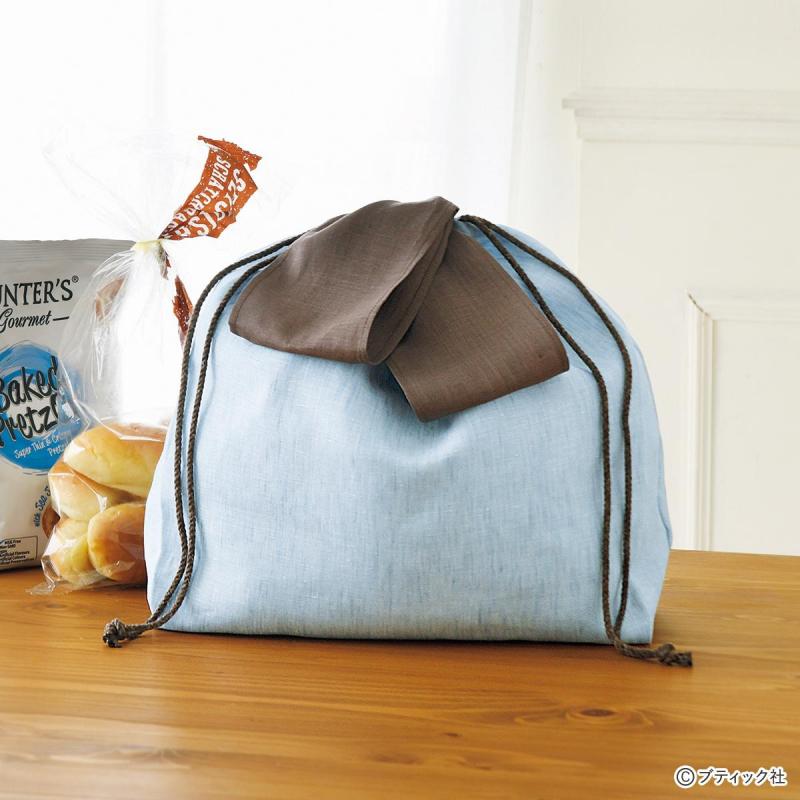


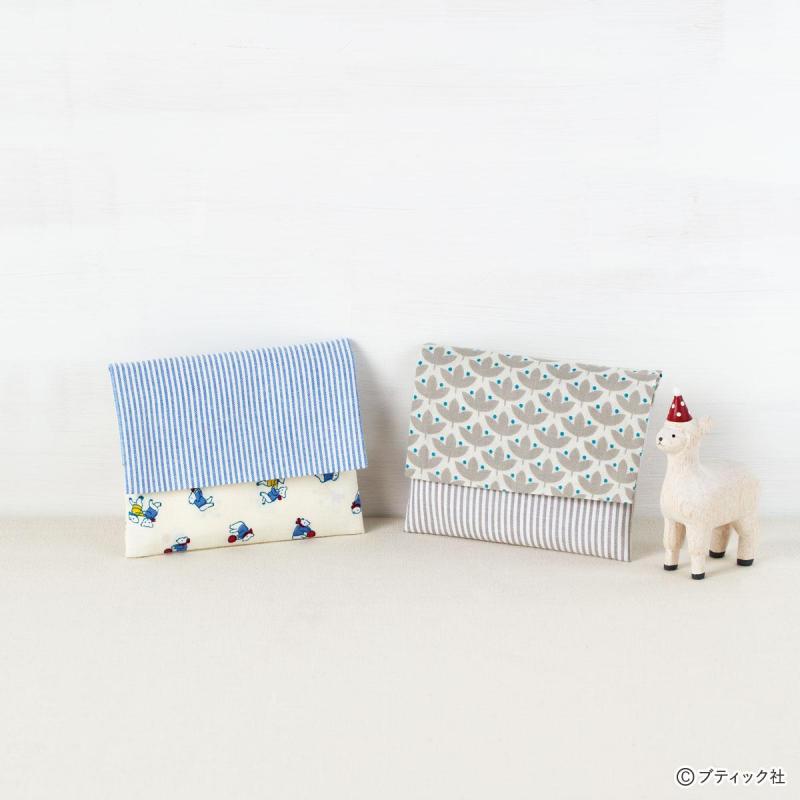
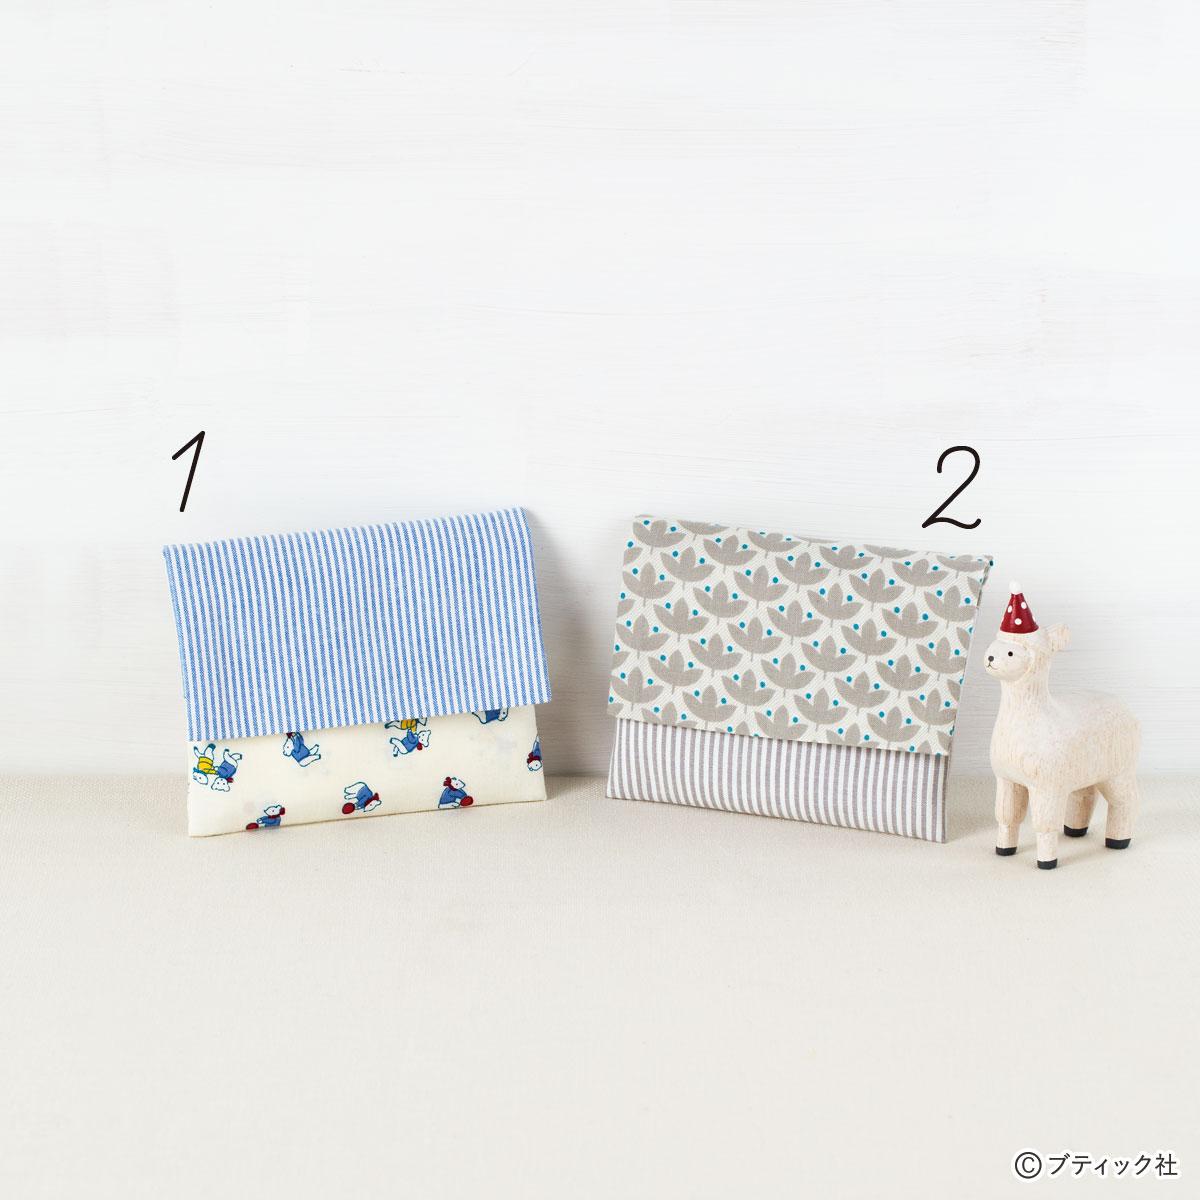
必要な材料
【No.1の材料】
・A布(綿ストライプ 本体A用)20×50cm
・B布(綿ストライプ 本体B用)20×20cm
【No.2の材料】
・A布(綿プリント 本体A用)20×50cm
・B布(綿ストライプ 本体B用)20×20cm
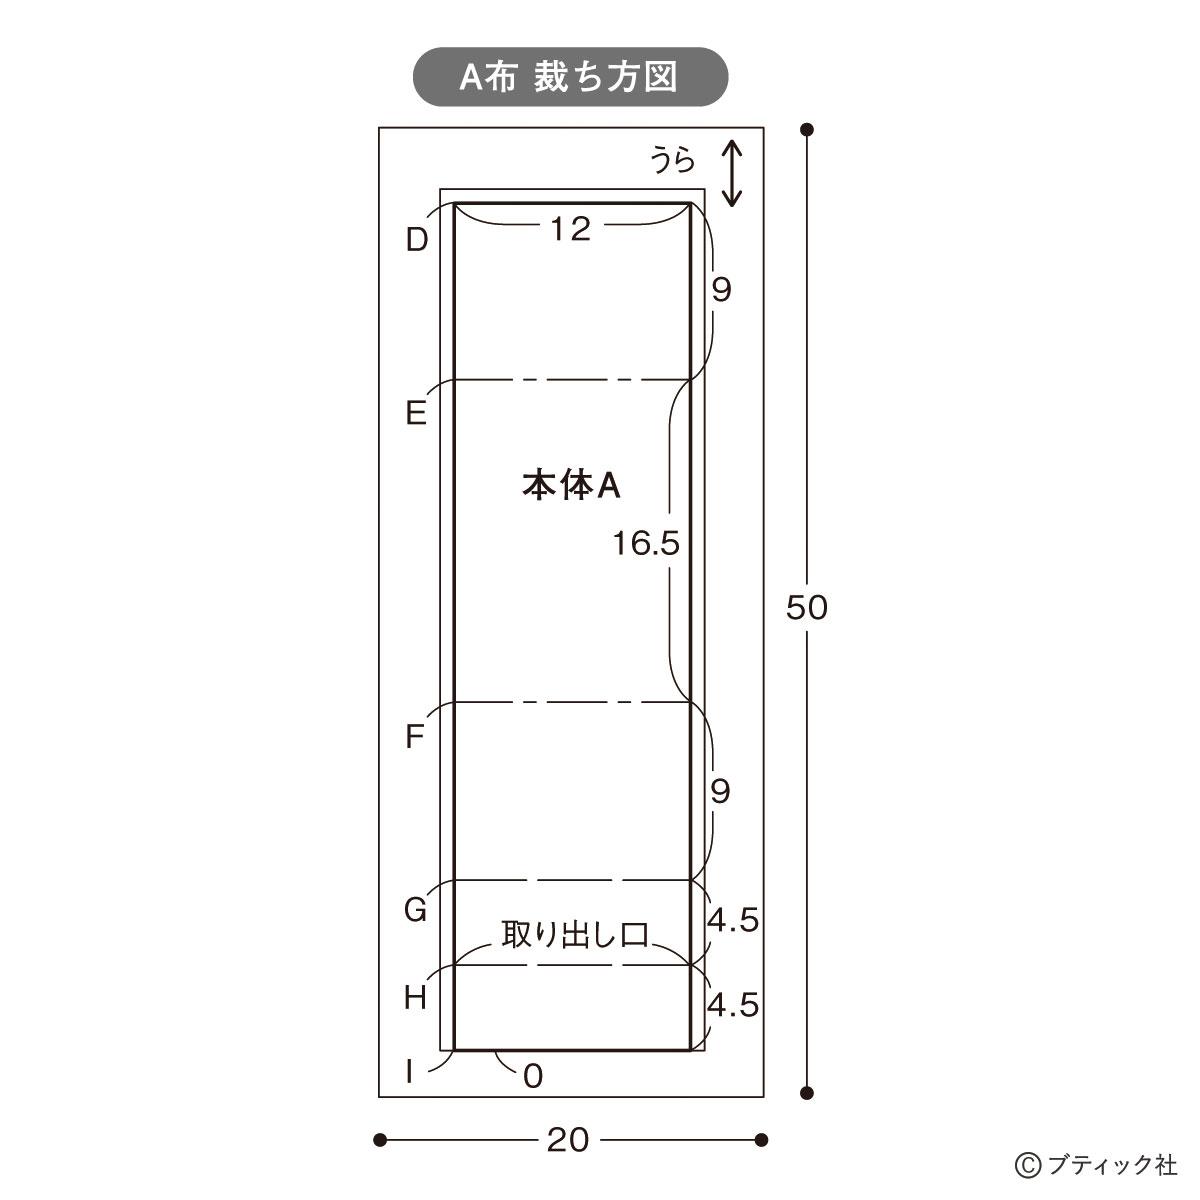
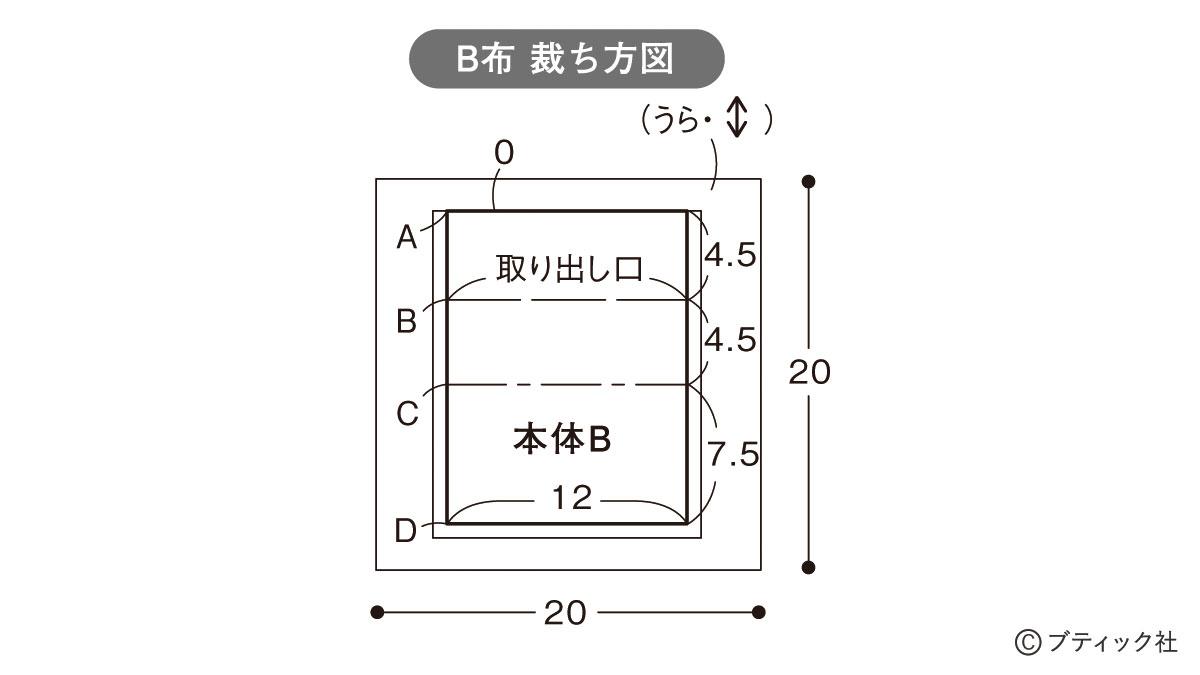
製図 ※実物大ではありません


裁ち方図
※指定以外1cmの縫い代をつけて裁ちます。
*A布 裁ち方図
*B布 裁ち方図
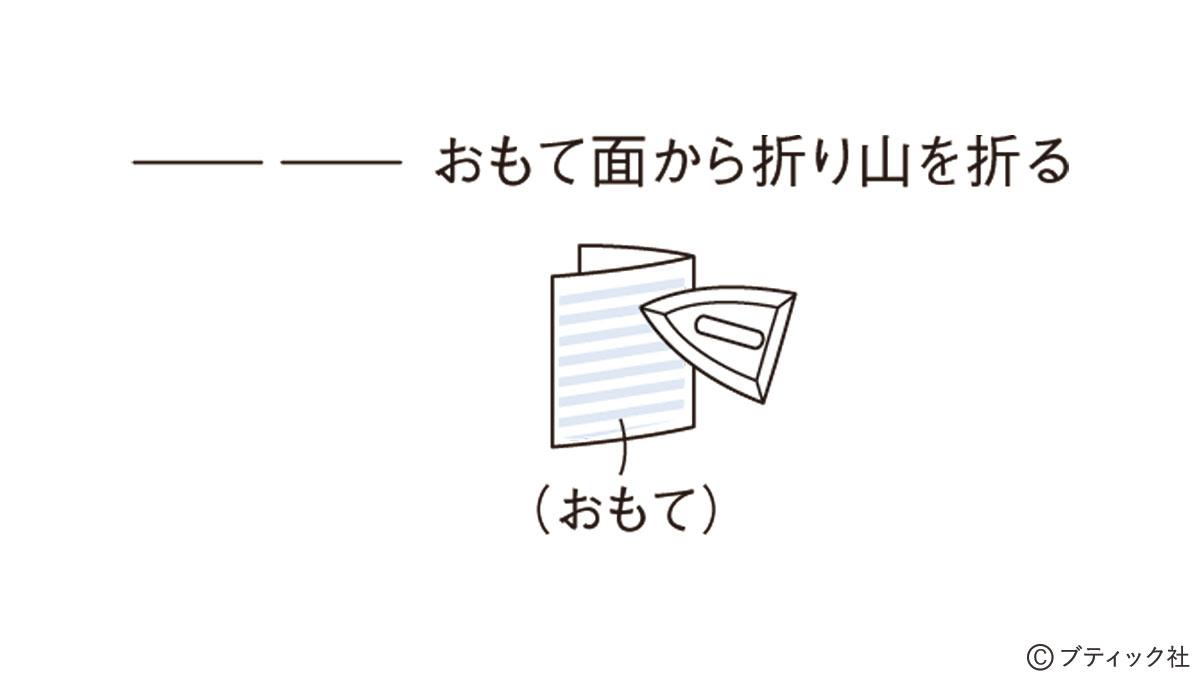
作り方
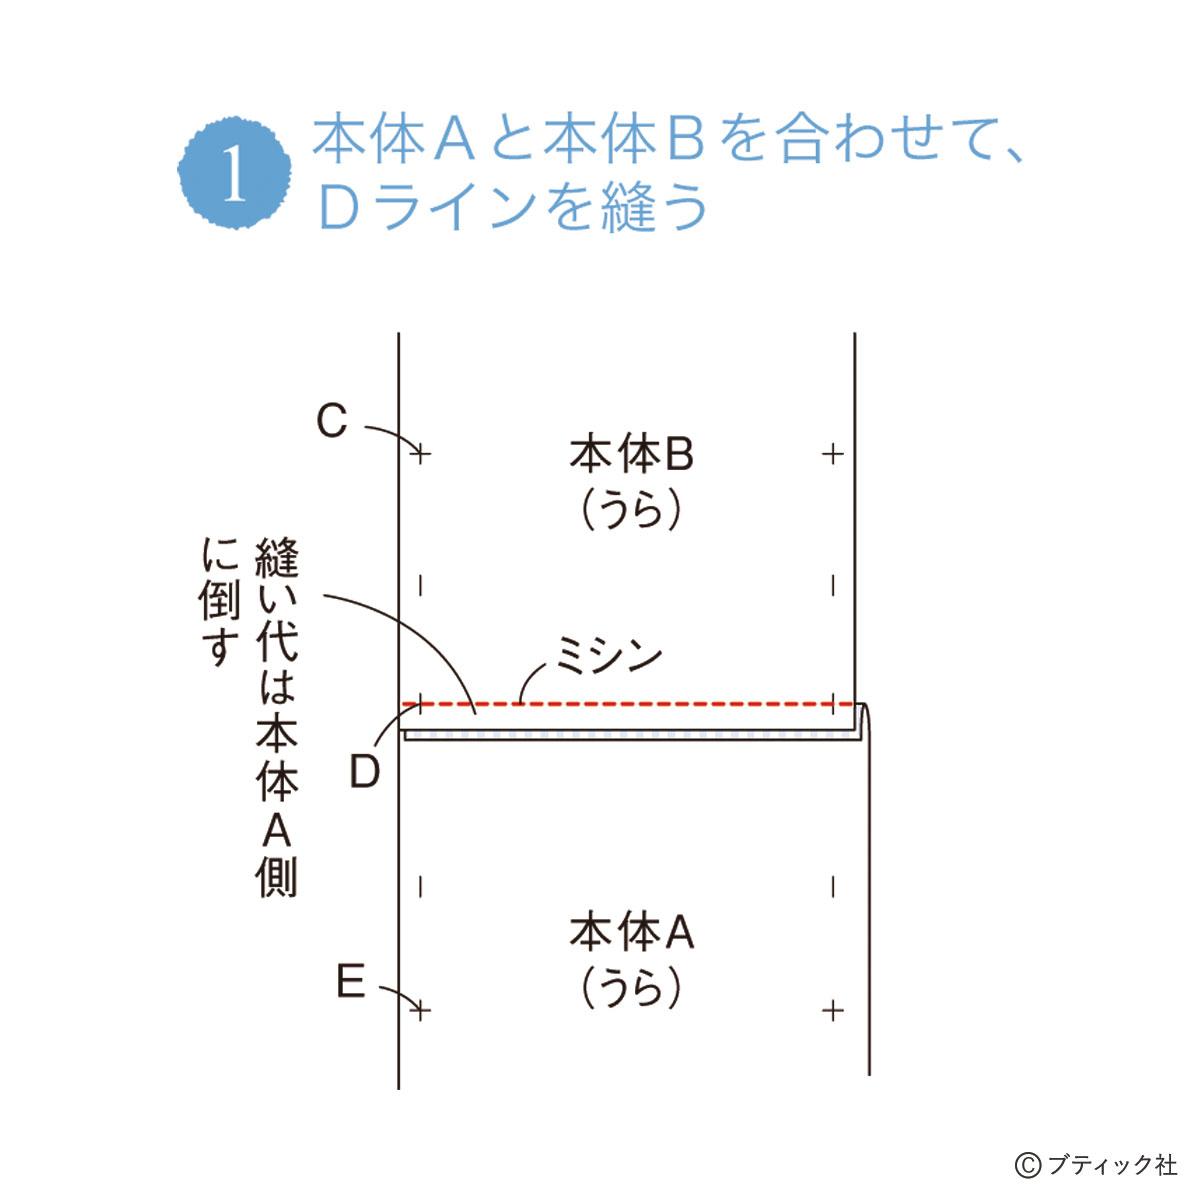
1.本体Aと本体Bを合わせて、Dラインを縫う
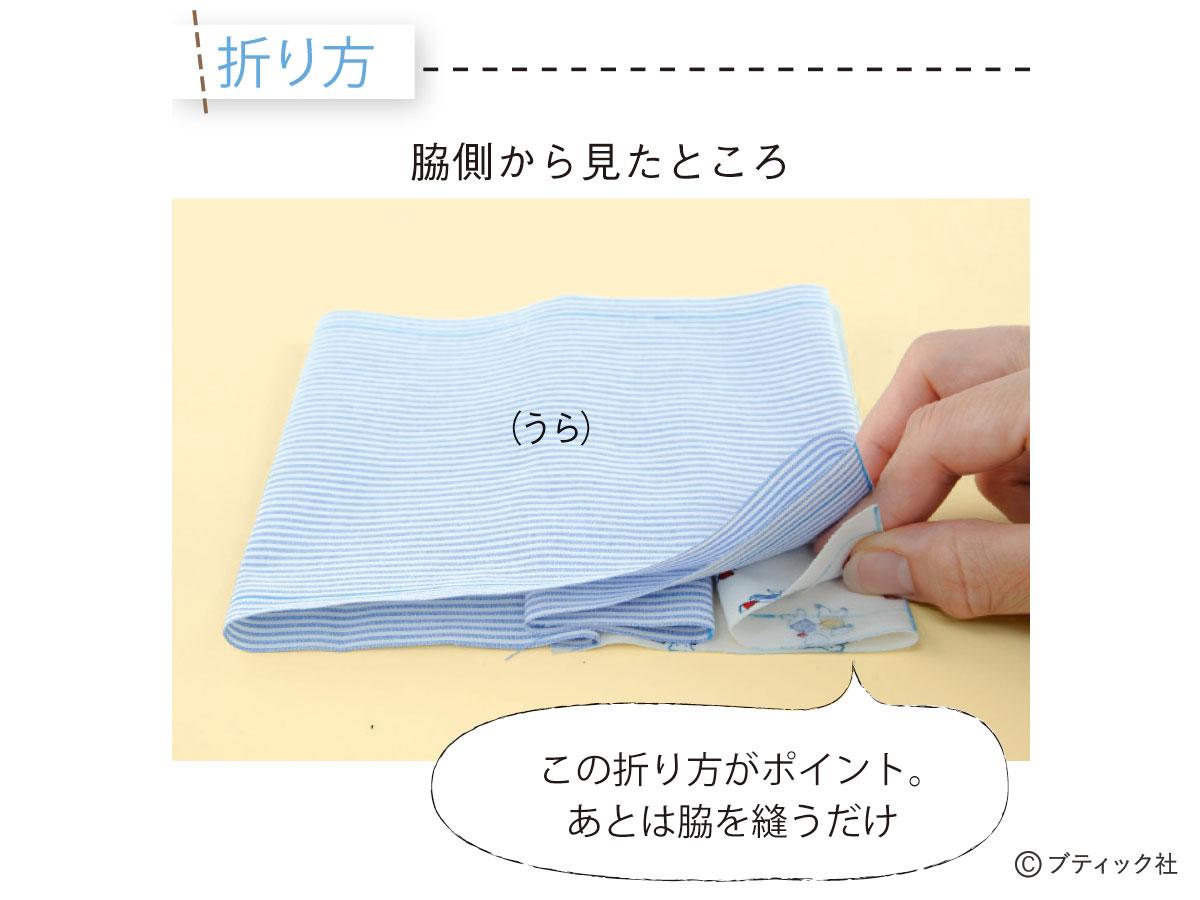
2.図のように折り、脇を縫う
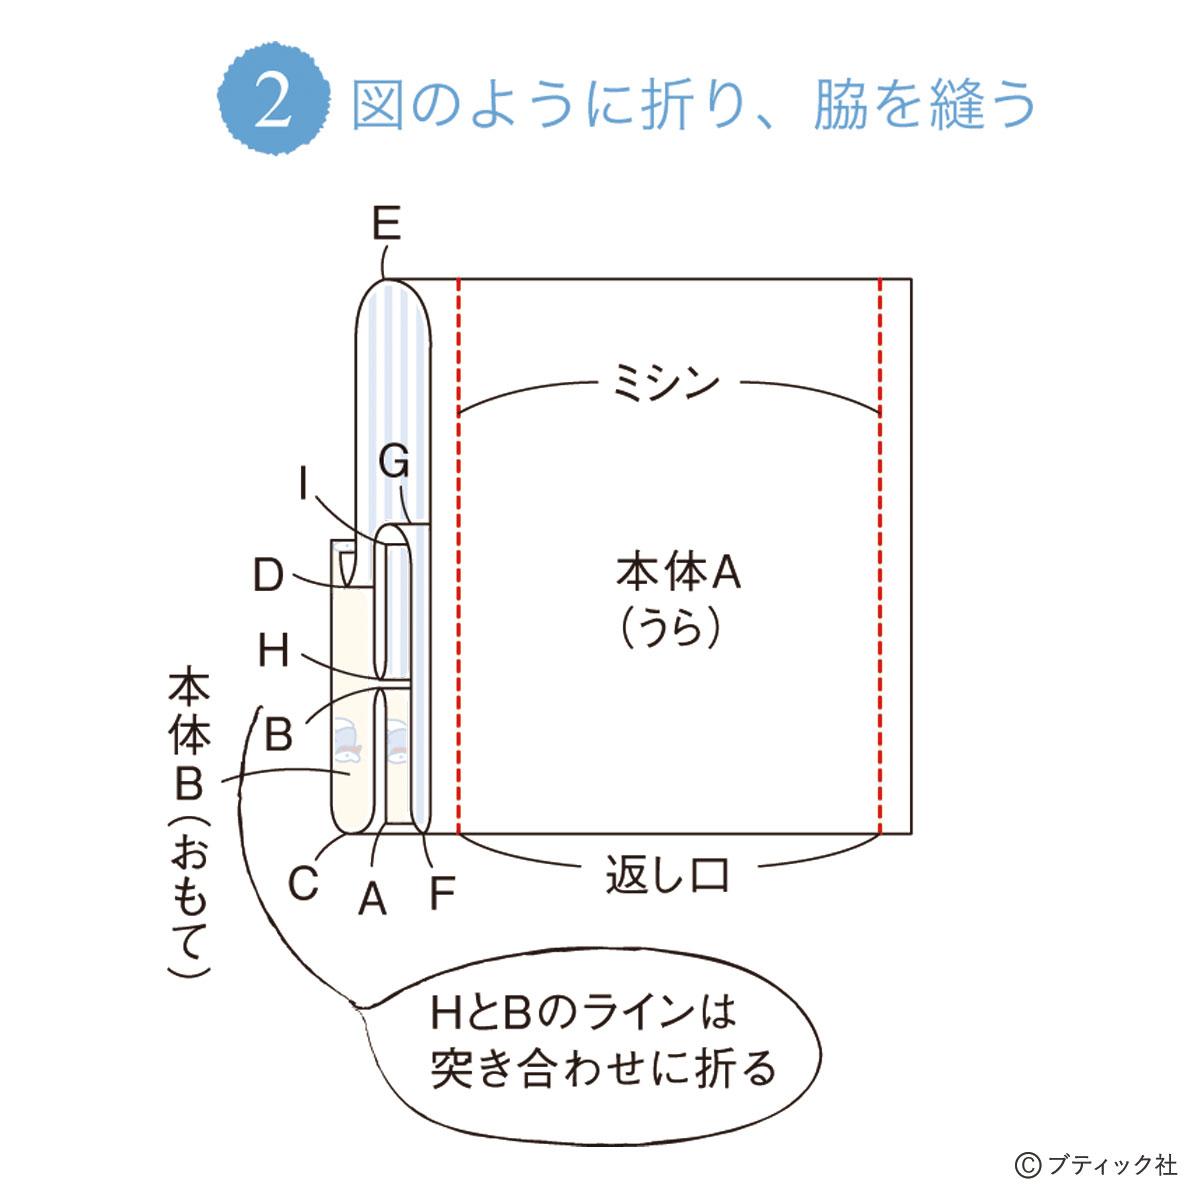
【折り方】